Showing posts with label 1989. Show all posts

Tuesday, September 18, 2012

Coolant related Dress-up and Upgrades

I have wanted to tackle a couple of dress-up and performance upgrades to my cooling system, for a while now. I have long wanted to dress up my ugly upper radiator hose, already cut up and modified for my Vortech supercharger installation, a few years ago. Most of you know what this modified arrangement looks like, but here is a pic of what I was starting with:

First, I tackled the dress up of the upper radiator hose. My idea was to use the center section of the hose, that was cut out and removed, during the Vortech installation, to cover the stainless steel pipe, and make it look like one, solid silicone hose, if that makes sense. Of course, I had thrown out the leftover silicone hose pieces, when I installed my Vortech! (doesn't everybody?!) I didn't want to spring for an entire new set of the FRRP blue silicone SSP hoses, which was the only option that would match, what I already have. Luckily, I found that Laurel Mountain Mustangs sells just the upper radiator hose for $19.99 plus shipping! What a great deal!
http://www.laurelmountainmustang.com/products/1986-1993-mustang-5-dot-0l-upper-radiator-hose-s-s-p-slash-police
So I bought the new hose, and began to cut it up. Just as an FYI there was maybe 2 oz. of coolant in my upper radiator hose, when I removed it, thats all. I used a cut down plastic water bottle and a hd paper shop towel, to catch the fluid.
Job one was to cut the brand new hose, per the Vortech instructions. They specify that you cut a 3" elbow out of the intake manifold end, and a 2" elbow out of the radiator end of the hose. I cut mine a little long, so that I could 'whittle' my way back, to what I need, and ensure that I didn't end up short. Then I cut down the leftover center section of the hose, to fit in between the two elbows, and 'bridge the gap', covering the stainless pipe.  After futiley attempting to slide the center section of hose, over the ss tube, I now know why nobody else has attempted this! lol I try silicone lubricant and even WD40, to slide the tube, with no luck. All I get is the center piece of silicone, literally stuck, halfway on, refusing to come off. After getting the hose stuck, twice, then removed, I realize that I need to try a different approach. So I lubed up the inside of the hose and the ss pipe, with WD40, and then I heated the hose, super hot, with a heat gun. That did the trick. However, it still was [u]not[/u] easy, not even close. With the hose, burning hot, I was able to get a good portion of it on, then with a lot more heat, inch the hose on, just a little bit at a time. I got three really nasty blisters, before I was smart enough to put gloves on! I also planned on eliminating the metal hose clamps, on the center joints, instead using these trick Gates Powergrip heatshrink clamps. These are the same hose clamps used by Foose, the Ring Brothers, Rad Rides by Troy etc. etc.
I am only going to use the clamps on the center joints, not the manifold or radiator ends. While they are trick and cool, they are one use only, then they have to be cut off, using a special tool. My theory is that if you spend $100K+++ on your car, cutting off $7 clamps, for service is no big deal! I'll retain the metal worm screw clamps, so that the hose can still be easily removed. I then installed the two elbows, and test fit. Then cut and test fit, then repeat, and again, you get the idea. As I said, it was much easier to get to the right fit, just a tiny bit at a time, without ending up being too short!
Once I had the proper fit, I made some witness marks on the new hose and put on the Gates Powerclamps, using a heat gun. Reinstall the hose, and Voila! Here is what we have, now:


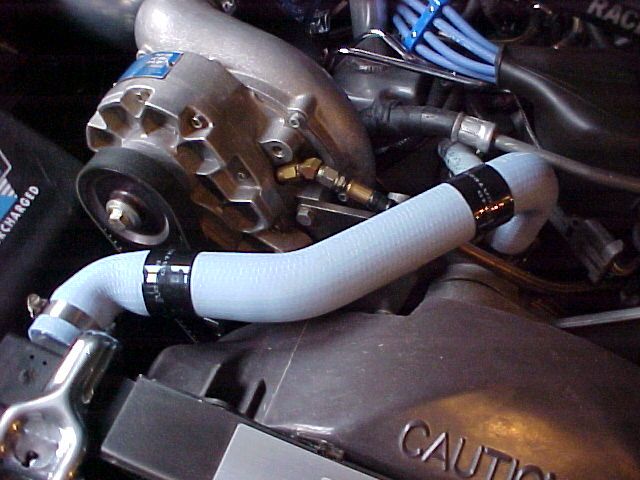
I am so proud of how great this hose turned out, words can't express it. Just adds a touch of those mega-dollar custom cars, to my little old car!

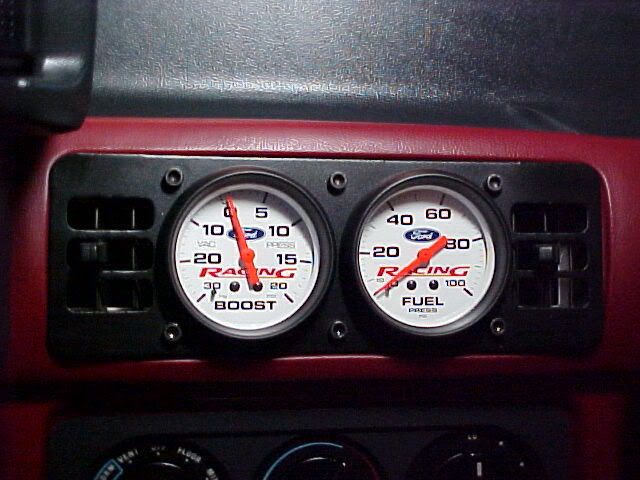
I have long wanted to upgrade and replace my cracked, old and nasty OE plastic coolant overflow tank. I never liked the standard rectangular aluminum tanks, or even the round tubular pipe style tanks. Then when I saw the trick new tank from Moroso, in 5.0 magazine, I was sold!

Add caption
 I found the best price on Amazon, and got mine for around $120.

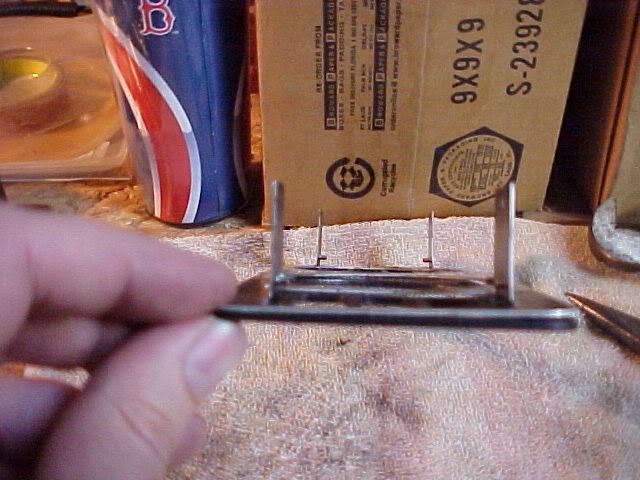
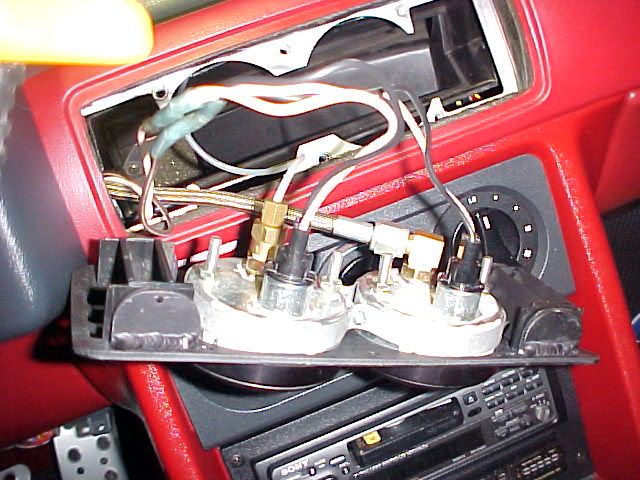
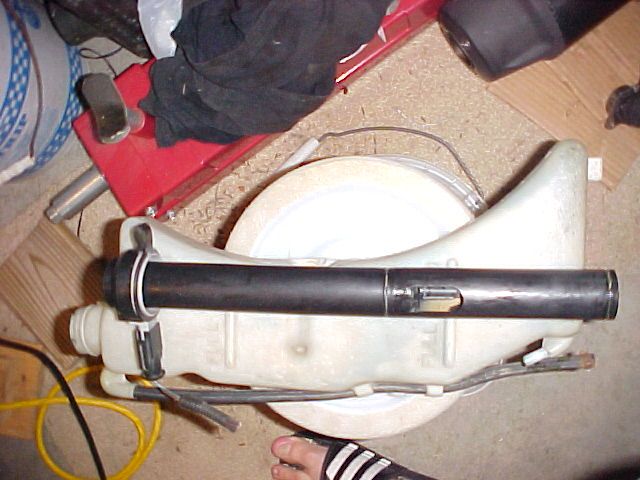
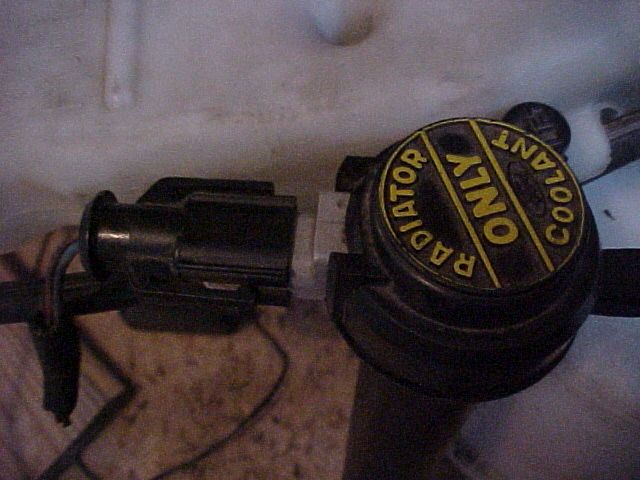
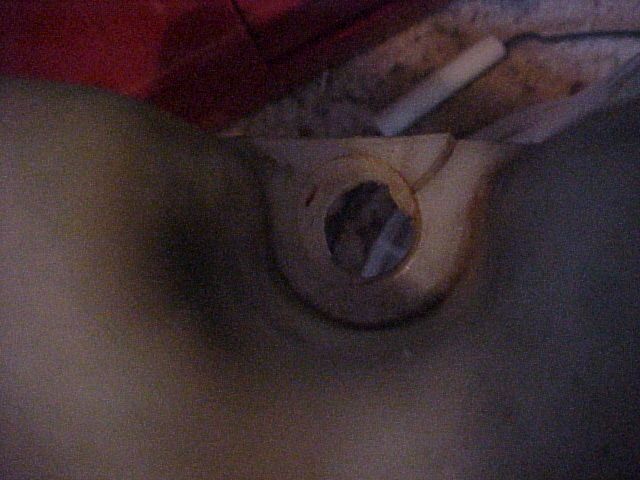
Moroso advertises this as a simple, easy bolt on, using your existing overflow cap. This is not exactly true. If you have a 1986-1993 LX, you are all set. Your cap, which does not include the low coolant sensor, will transfer right over to the new tank. If you have a 1990-1993 GT, your cap and low coolant sensor assembly will easily transfer right over to the aluminum tank. If you have a 1987-1989 GT, your low coolant sensor assembly will not work with this tank. Moroso, does not make this distinction, in any of their advertising. As an aside, Moroso could have very easily made their tank, to accept all caps, and low coolant sensors, if they had done more complete research. From my tone, you can probably figure out that I have the 1989 GT low coolant sensor that will not work with the Moroso tank. Here is what my sensor assembly looks like:
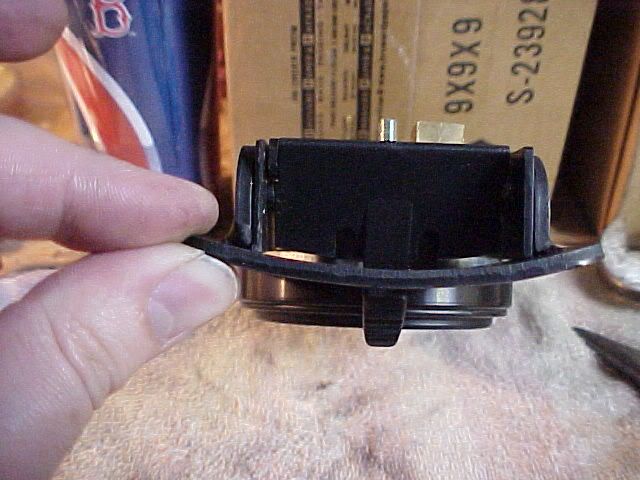
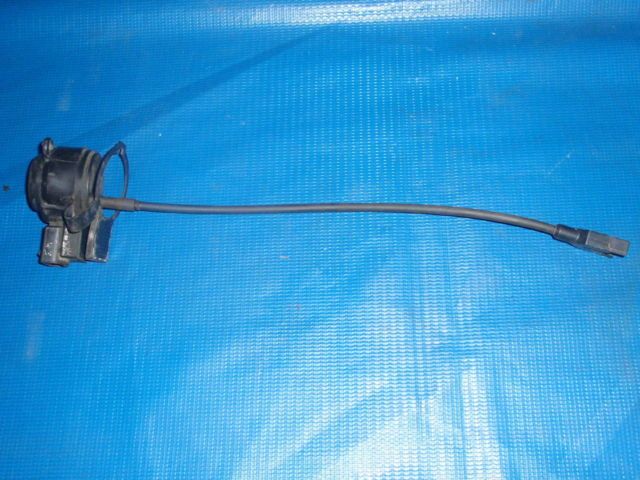
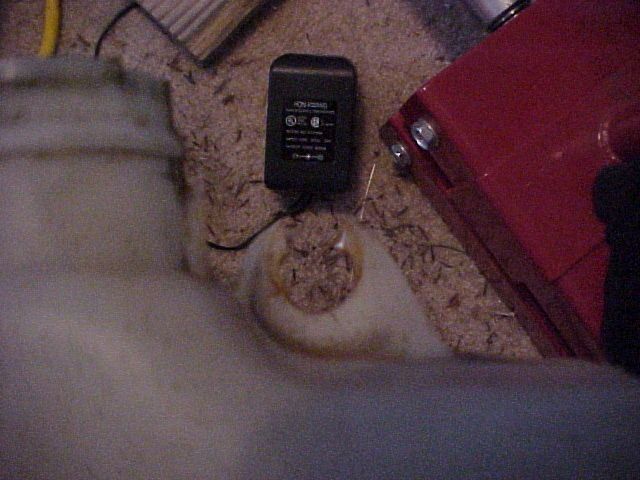
And this is the wiring harness plug for the 87-89 style:
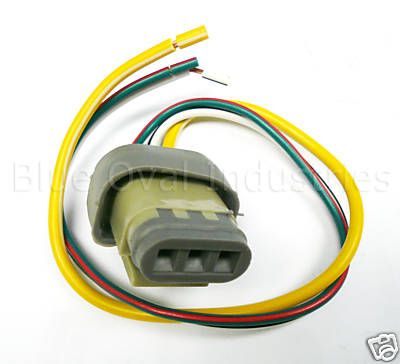
If you wish to install the Moroso tank, and retain your low coolant light feature, you need this cap and low coolant sensor assembly (add $75 for a real OE Ford product, from Latemodel Restoration Supply):
However, it doesn't end there. The 90-93 sensor uses a different, 3 wire harness plug, not the two wire plug that is OE on my car. LateModel Restoration Supply and Blue Oval Industries sell the harness and pigtail, to retrofit, the newer style sensor/cap. Add another $15 added to this 'simple' $100 project!
 
The installation of the tank is very simple and straight forward. Unbolt the old tank, and bolt in the new, it fits perfectly. The aluminum tank is thicker than the plastic one, and has no 'give' of course. This makes screwing on the lower speed nut assembly a chore, but it can be done. I also had to splice into my two-wire harness, and solder in/heat shrink the new three wire plug. 5.0 Resto, nicely provides how to properly hook up the wiring, on their website. The third, extra wire, is simply an added ground. I believe that the two wires would be sufficient, and would find ground, through the circuit, but I wired up the extra wire, anyway. I made everything, super neat, essentially re-making the harness end, with new split loom and friction tape, the same way that Ford did it. Here is how the tank looks, installed, you really can't see too much of it, but you get the idea.
I added the Saleen square metal emblem, not sure if it is going to stay or not.


Here are a couple of pics of the cracks in my old plastic tank:
By the way, one final little 'gift' from Moroso --  they failed to mention that your stock overflow hose is now too short to get from the radiator to the bottom of the aluminum tank. So you will need about 18" of 5/16" (inside diameter) hose, as well. Thanks, Moroso! Great product, but they need to work on their description and include comprehensive instructions, instead of none.
I topped off the coolant, to the max cool level, and topped off the radiator, burped the system, and was good to go!

Thursday, August 9, 2012

1989 Ninja ZX7 Header Wrap

In an effort to keep this section from becoming a desolate wasteland, (I keep looking for tumbleweeds to blow by around here, lol!) here are some pics of one of my minor winter projects. I had an old gift certificate from Summit Racing, that was burning a hole in my pocket. In addition to my Mustang, I also have a really nice, perfect shape 1989 Kawasaki Ninja ZX7. No big surprise, as most car guys are into motorcycles, as well. Somebody over on the ZX Forums posted up a nice thread about wrapping his headers with exhaust wrap. He also has a nice set of full stainless Muzzy exhaust, which is what I run. Only mods to my bike are the aforementioned exhaust, K&N filter and a very minor jet upgrade to accomodate the exhaust and air filter, thats it. Anyway, no how to or step by step pics, just the finished pics of the finished product, right after I finished painting the wrapped headers with the high temp silicon paint. I got a complete DEI kit, from Summit, with enough wrap and stainless steel ties to do a standard set of V8 headers, more than I needed. I'm sure that some of you guys have done this, before. It is a tedious process, that takes a lot of patience. It is also messy, as there is a lot of 'gunk' in the wrap, that comes out, when you wet it. In addition, as you can see, my headers are actually quite close together, with a couple of the bends, so it was challenging, pulling them apart and feeding the limp noodle wet exhaust wrap through the crack!! Enough rambling, here are the pics;


I was also able to get the header mounted back up, despite extreme cold temperatures, and being too stubborn to remove the radiator! A couple of scraped knuckles later, it was definitely worth it. Finally a couple of pics of the bike:


I forgot to mention, I'm really hoping that the exhaust wrap helps to tame the high running temps that these bikes are notorious for. With the headers being sandwhiched between the heads and the radiator, I'm sure that the extreme radiant heat, wasn't helping the cause. The wrap is supposed to be super efficient, in keeping the heat, within the header, and right out of the tailpipe. We'll see. I also am hoping for some limiting of the tinny, buzziness of the exhaust. I also repacked the Muzzy can, and added an additional baffle. I'm not expecting miracles, but I'm sure that even these small changes will make a difference. Its either that, or I start to wear earplugs, under my helmet! I must be getting old...

Wednesday, August 8, 2012

Chicane Gauge Cage Install

If any of you have been following the vent/pillar gauge thread in the Open Discussion forum, then you know that I recently purchased the Chicane gauge cage panel. It was expensive at $149, versus $40 bucks for the Autometer product. After a lengthy conversation with Joe Gosinksi, owner/fabricator of Chicane Sports Tuning, my choice was clear. Joe worked at Saleen for 10+ years, and designed a lot of products during his tenure there. The Fox era pedal covers, the S351 double pass radiator and the Saleen race gauge panel, were all designed and built by Joe. The original gauge panel was put in to Tim Allen's RRR (Casper) car. Then the panel went into supercharged SC's and the SA-10's. Autometer approached Saleen, about producing their own gauge panel, and Saleen (the man) turned them down flat. Unfortunately, the part was not patented, and Autometer went ahead and manufactured their own product, anyway. Saleen complained, to no avail. The Autometer product is not the same, not even close. They made quite a few changes, for ease of manufacture, and pricing, none of them for the better!
After speaking with Joe Goskinski, and Mark LaMaskin, I came up with this interesting tidbit. Saleen put the gauge cage into a few of their production cars. A very small number, of the original, handmade pieces, were sold through the Speedlab. After Saleen could not or would no longer manufacture the handmade piece, they actually began to sell the Autometer part, through the Speedlab!! Those in the know, will not be surprised, by this questionable move, by Saleen. What the hell, the Autometer part was readily available, and cheap, at 1/3 the price of the handmade piece. So Saleen could still sell the Autometer plate, and two inexpensive Made in Mexico VDO gauges, for $299!! (FP isolators $100 extra!!)

Here is what I started with. Note that the Autometer plate is completely flat, and does not fit well, at all. The dash pad is curved!! Also the corners are bent up, when the screws are tightened etc.


Here is why. Check out the profile of the Autometer panel. It is very thin, and flat. Also note the thin piece of sheet metal, used to hold in the modified AC vents.
Now the Chicane part. Notice that it is very thick, easily more than twice as thick as the Autometer part. It is also curved, to match the curve in the dash pad. The tabs that hold in the AC vents are welded in place, making one solid piece. The Chicane piece is also powdercoated, a flat, brushed black.


Now check out the backing plates. The Autometer (left) and the Chicane (right) Notice how their is a large area for the AC to flow through the Chicane piece. Also notice that the threaded inserts are pressed/riveted in, from the front, on the Chicane piece, (more on that later). Also, the Autometer plate is much thinner, of course.


So I go to drop my gauges in, and they don't fit!! WTF! So I try my old Ford Racing gauges, and they don't fit, either! I guess the powdercoating and the handmade tolerances, have left the openings a tiny bit too small, for the gauges. So out come the files and sandpaper, to open up the holes. I could have used a dremel, or a small sanding drum, but I wanted to remove as little material as possible, for a nice, tight fit. Also, the Chicane piece includes two curved trim rings, so that the flat gauges will mate up to the curved panel. They are billet aluminum, and anodized black, very, very trick, indeed! However, this means, that you have one shot, to get the gauges in straight, and line up the trim rings, with the plate. Otherwise, you are pulling it apart, and scratching everything up -- unacceptable. I did pretty good, with one shot, I scored about a 98%, but i am overly critical of myself, nobody else would ever notice the difference! Here is where we are now:


And from the back:


So I get everything hooked up, electrical connections, vacuum line, isolator hose etc, and the Chicane backing panel slid into place, ready for final assembly. I finally get all 6 allen screws started, and if you have ever done this, 6 blind little screws is a major PITA. Then you just tighten up the plates, sandwiching the dash pad. Chicane includes very nice button cap allen screws, versus the autometer which has large diameter regular allen screw heads (ugly) So I set about tightening up the panel, kind of like torque-ing head bolts, a little at a time. I go to finally tighten the last screw, and I hear a metallic 'POP' from behind the assembly. One of the screws is now free, and no longer threaded into the backing plate. Yep, one of the pressed in/riveted thread inserts has popped right out of the Chicane piece!! I string together enough curse words to make George Gast (sailor) run for cover, and resign myself, that I will be starting over. All screws have to come out, and all connections undone to get the backing panel removed. One of the threaded inserts was placed too close to the edge, and there was not enough material to support it, and the plate cracked. If I had any foresight, I would have simply turned the backing panel around, so that the inserts would be less likely to pull out. Oh well, I simply installed it the way it was shipped to me, pre-assembled. If you buy the Chicane panel - You have been warned!!  ](*,)
Luckily, I have two Autometer backing plates, to serve as backup. One of them is a very early piece, that actually came from the Speedlab. It is thick, and the threads are welded in, from behind the backing panel. However the vented area is much smaller, restricting the AC flow. So I get out the hacksaws and a large file, and go to town, enlarging the vents. Add another 1/2 hour to the project, lol! I also previously matched up the Autometer plate, to the Chicane, and the scew holes line up, and they are the same diameter, thank God!! Here is a pic, just before the 'carnage.'

Anyway, I get the whole shebang re-installed, with the new backing plate, and it tightens up, beautifully, matching the curve of the dash pad. Here is a pic of the finished product:


And at night:


I used those slick little Autometer 'hats' that go over the light bulbs, to change their color. Green in my case to match the factory dash.
This should in no way, be viewed as a criticism, other than constructive, of the Chicane product. It is a 100% handmade custom piece. These minor problems are to be expected when dealing with something that is custom made. If you want easy, then stay away from the custom stuff! This is what makes our hobby fun, the sanding, and grinding, and modifying things to fit!! The end result is well worth it!