Showing posts with label 2006. Show all posts

Thursday, November 29, 2012

Custom K Bike Stands for Winter Storage

When I first got my bike, I viewed a set of stands as a necessity, for working on the bike and, more importantly for stable Winter storage. Being naive, I began searching the internet for BMW K bike stands. Imagine my surprise when I discovered that any decent set cost in excess of $600!! I guess I was just spoiled by years of simple sport bike stands costing around $150 a set! I already had a brand new set of T-Rex stands, from my previous Ninja, that were brand new. They are well-built, heavy duty stands, that should be more than capable of holding my K1200S a few inches in the air. I did not want to pay $600+ for a set of stands, and I figured with a little ingenuity and fabrication, I could make my excellent stands, already on-hand, do the trick.

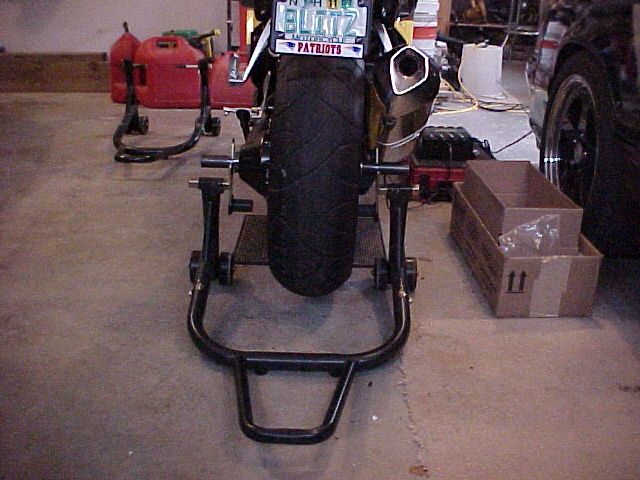
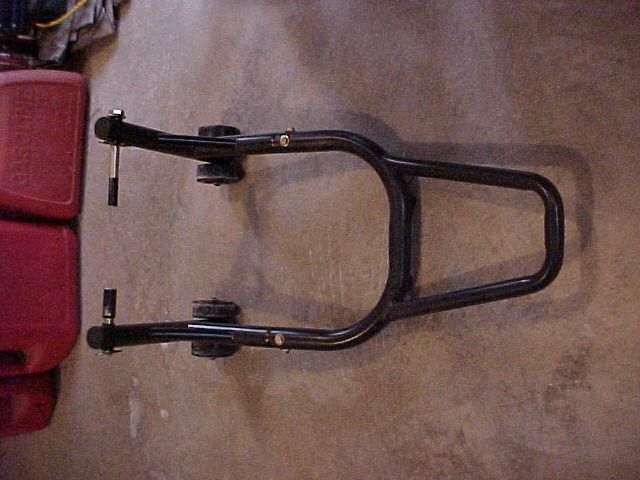
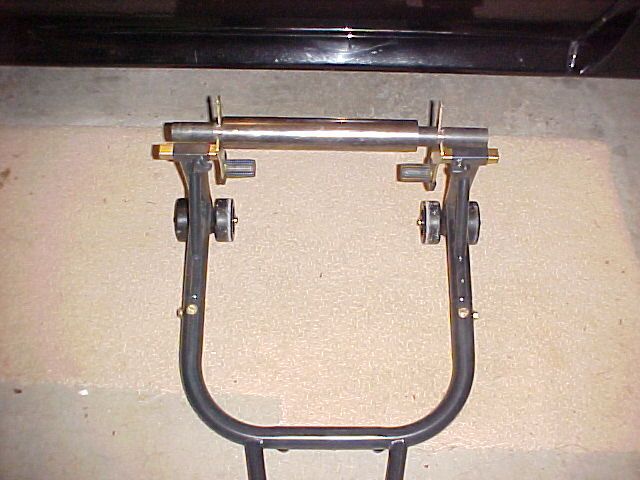
The first thing I did was fabricate a bar, to go through the BMW swingarm, that would, in a sense, provide two mounting/pivot points for the standard sport bike stand. I cut down an old Mustang axle that I had laying around (free) to the proper length, and gave it a try. I also had a local machinist cut two grooves, on his lathe, for the bar to rest perfectly in the stands 'claws'. The diameter of the axle is only 1.25", which I thought would be fine. What I didn't count on is that the bike would not sit level on the small diameter steel tube, it wanted to lean, to the passenger side, and 'rock' on the small diameter steel bar! Quite a pucker factor the first time I tried it out!! Luckily, the bike was still held, somewhat stable, albeit leaning precariously to one side! With the help of my wife, for assistance, I was able to get the bike off of this leaning perch. I realized that the bar, going through the final drive and swingarm, needed to be the same diameter as the pass through, (around 2.125) duh!! The bar would also have to have a smaller diameter, at the ends to sit in the stand's claws as well. Fortunately, I found a place that sells 1' and up lengths of all different types of metal, on line. There was a piece of round stock that measured 2.125 on the outside and exactly 1.25 on the inside! With shipping it was less than $50, if memory serves. I tried this combination out and it worked, perfectly. I was able to tap the axle tube, into the new, thicker stock, and it was a tight fit! Bear in mind this stand is only for storage, and a more permanently stable platform. Obviously it will not work for any type of wheel or final drive type of service. I have since purchased a Black Widow single side swingarm stand for these duties. Or I can use my center stand, lol! Here is a pic of the bar:

And a pic of the stand, with the bar, off of the bike:
Finally, the rear stand, holding up the bike:
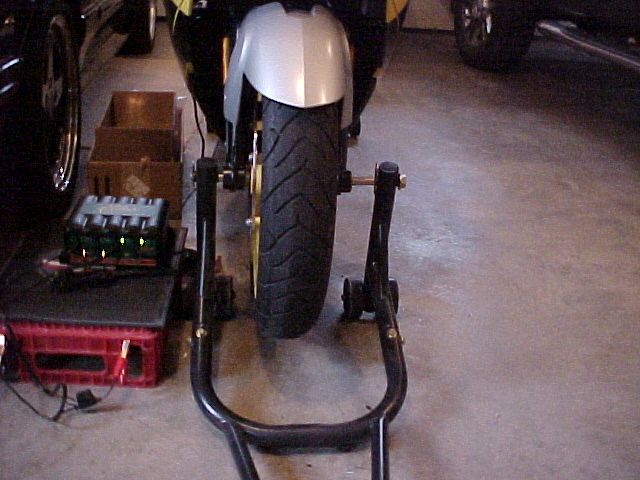
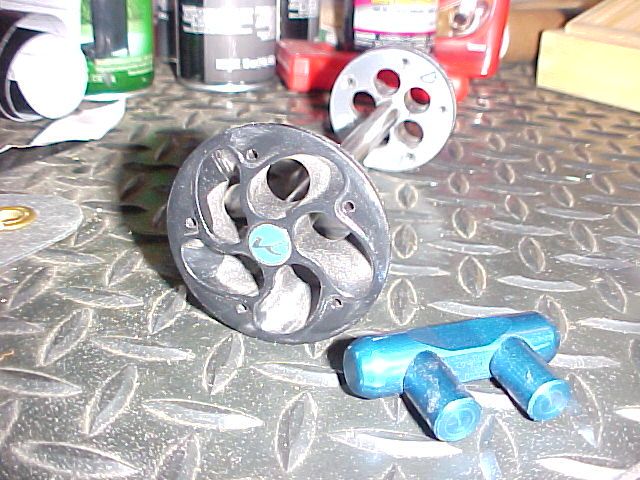
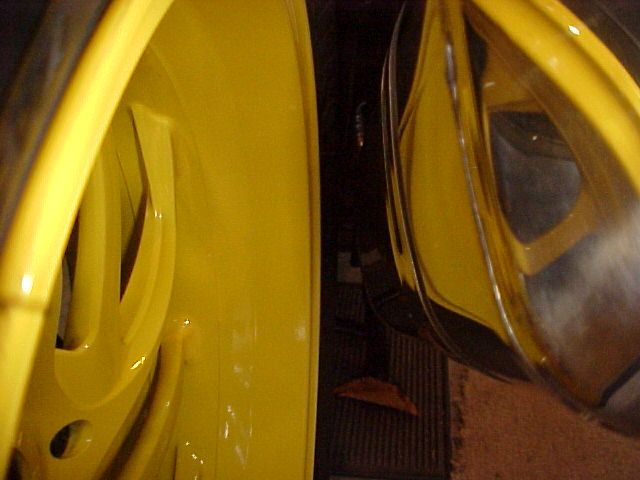
Since I had finally licked the rear stand, I moved on to the front. Surely this would be much easier! As it worked out, the stand, worked correctly, as it was intended on my K1200. Meaning that the standard two padded lift point (2 per side) will properly lift the K bikes, well off of the ground. This accomplished by setting the stands mounts at the bottom of the front wheel 'forks' if you will. Taking extreme care as not to pinch the ABS wire that is neatly tucked right in the way! This arrangement would be fine, short term, for working on the bike, removing the wheel etc. However, I was looking for something more permanent, and stable, like I had done on the rear. I decided to pick up the bike from the front wheels center, pass-through hole, similarly to what I had done at the rear. Luckily (again) the T-Rex stands came with a variety of lifting pins, and I was able to convert one of them, by removing the thick pad, and it slid directly into the right hand side of the front wheel. The left hand side has a smaller diameter, and would require a longer pin, as well. I adapted a large grade 8 bolt, by drilling it for a clevice pin. I would need to be able to slide this bolt, in and out of the wheel, to set-up and then remove the stand. A simple arrangement, really, and it works well, and is extremely stable, as I required. I added the military spec tape, just to prevent scratching from the hard, bare metal pins, as they slide in and out of the wheel. Here are the pins:

The entire stand:
And holding the front wheel up in the air; not quite as high as lifting from the forks, but high enough:
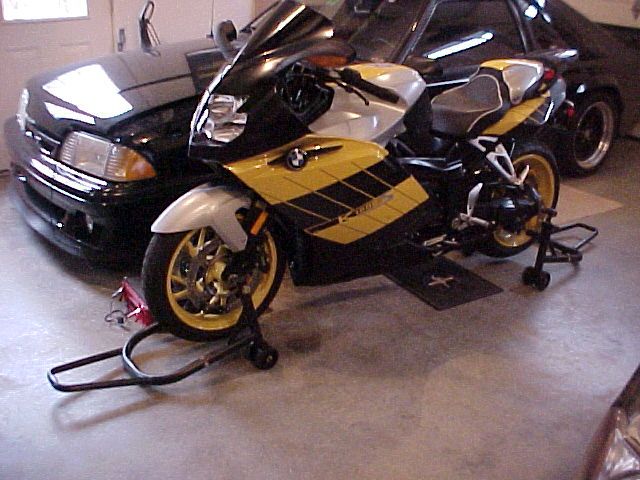
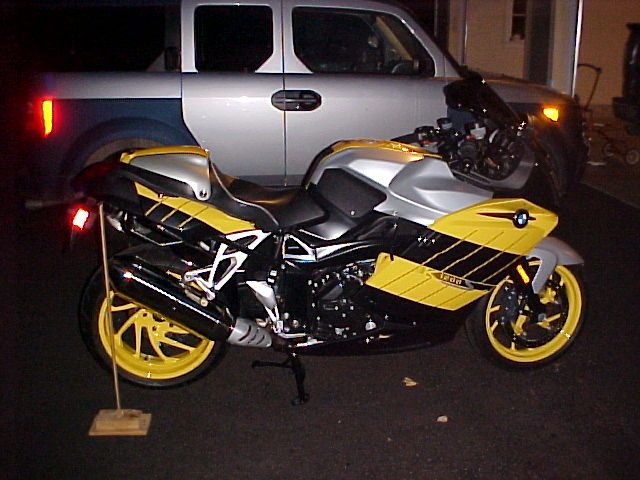
Finally, the entire bike, with both stands in place, ready for her long Winters rest!
All in, including the original purchase price of the T-Rex stands, and the new bits, I am only in for about $175 -- Bargain!!
Bonus pic of my Wunderlich 'Tornado' final drive cover. IMO, the nicest piece available for our bikes, and certainly the best built. I painted mine black, to match my frame. It stinks that most accessories, such as these are available only in silver or titanium grey. These bikes are available with (best looking color) black frames too!!


Monday, November 19, 2012

BMW K1300S Luggage Rack Installation - K1200S


I recently mounted the K1300S luggage rack, to my K1200S. Honestly, I did this as much for the looks, as for the added carrying space. To me, the rack looks like a spoiler, mounted to the rear of the bike, and extending the bikes's length, at an upwards angle, to the eye. I bet Andy Sills could have added 5 mph to his Bonneville top speed run, with one of these mounted, lol!!
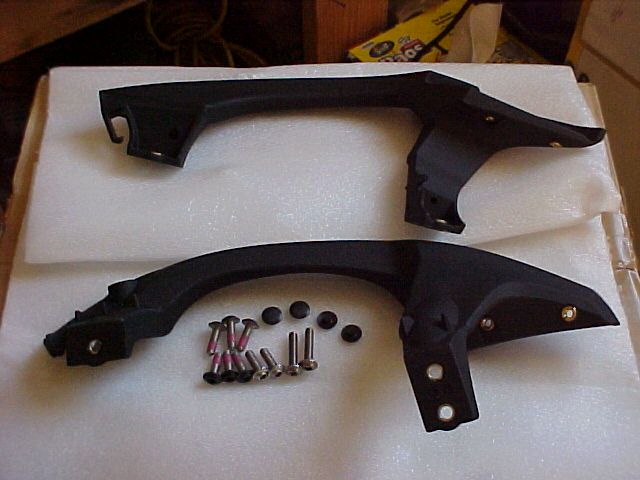
This may not even be worthy of a thread, since the installation is so straight-forward and easy! Some pic- sharing and couple of helpful hints and tips, if nothing else. Here are a couple of pics of the assembly, right out of the box:

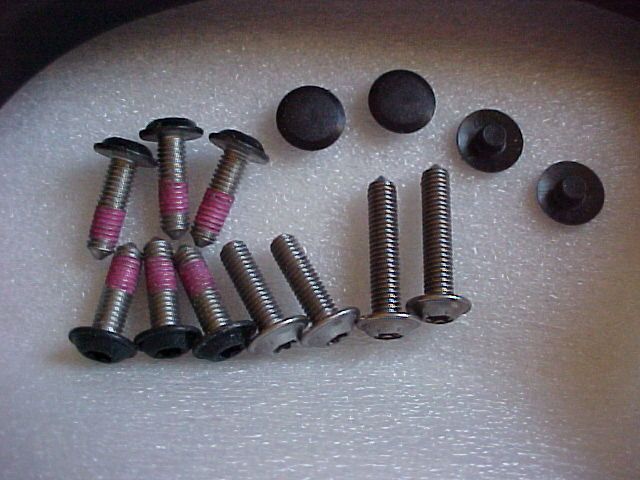
Check out the black headed filister screws, included in the kit! I didn't think that BMW had the technology to make bolts with a black head, lol! Just an FYI, these bolts mount the grab handles to the frame, and are not even seen! If only BMW could make replacement torx head screws in black for our bikes...

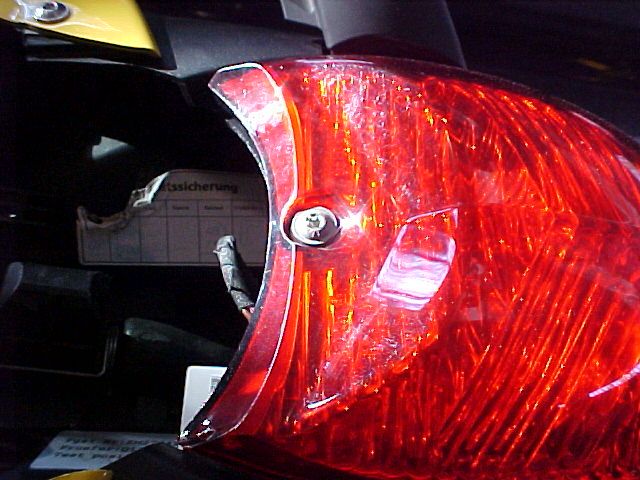
The installation instructions are quite simple. First, remove the seat, then remove the taillight assembly. The taillight is held on with a single screw only, and then a couple of friction fit slide pins. Slide the taillight to the rear, for removal. It is not necessary to unplug the taillights wiring harness.

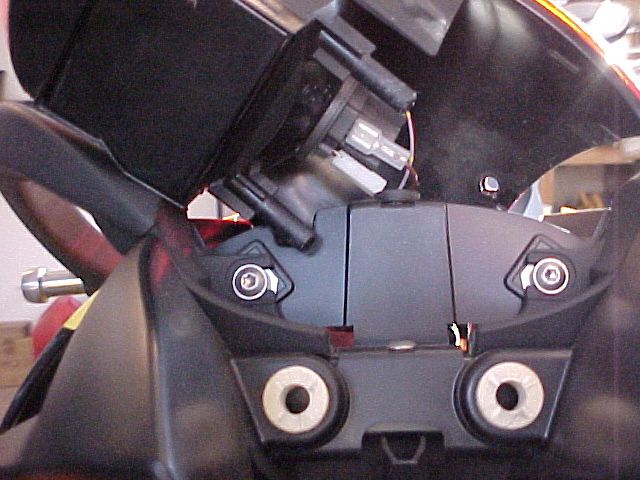
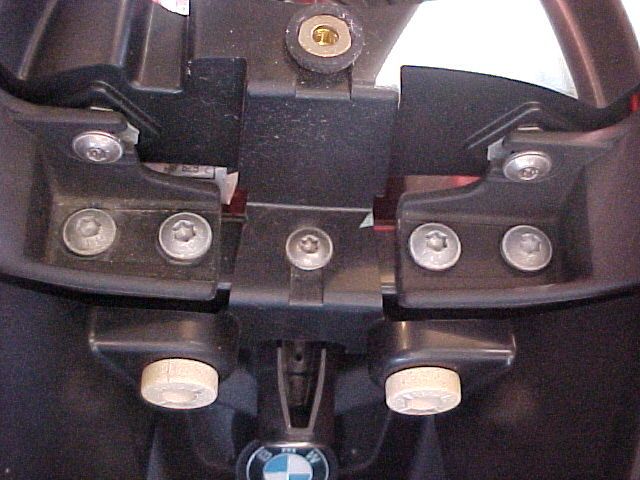
Next, you unbolt the stock OE grab handles from the frame. There is one bolt to the front of the handle, and two bolts to the rear, holding each handle in place. There is also one smaller bolt, per side, which holds some trim, and also the handles in place. The frame bolts come out hard, because of the thread locker, applied to them. Take your time to avoid stripping the frame threads!
Front bolt:
And the rear bolts:
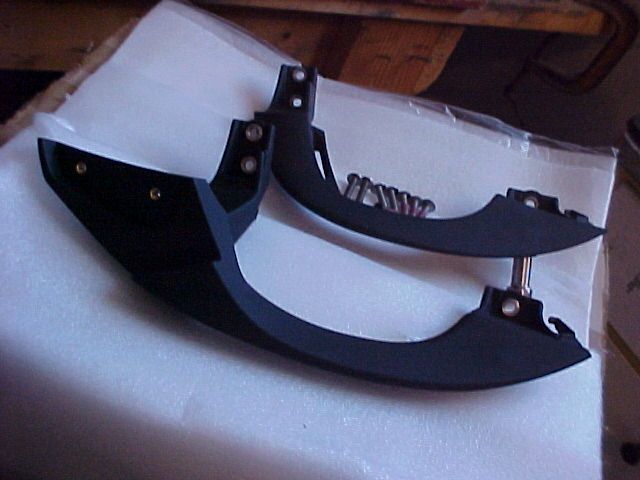
The new, longer handles mount in the same spot as the originals, using the new bolts, from the kit. (the super nice black headed bolts with thread-locker applied.) I just want to take  moment and say that the OEM BMW accessories are really top-notch. I have never had even one single issue, when installing a BMW factory accessory. Here are a couple of pics of the differences in the grab handles:
*Tip* Once the handles are installed, it is time to re-install your taillight. If you wait until after the rack is installed, you will have to unplug the taillight, and put it back on, from the rear. Finally, the rack is unbolted into two pieces, and the lower structure is bolted on to the grab handles.

The  little black plastic caps, cover the bolt heads, that mount the clear rack, to the assembly. They go on super hard! I had to use a wooden dowel, of the same size, and then hit them, hard, with a mallet, to get them on. Some of the racks, mounted on earlier K13's, do not have these nifty little caps, so you see the unsightly stainless headed screws, lol. I wish that BMW had taken these steps, when producing the K12's and K13's, and used frame colored screws and bolts, for the entire bikes!

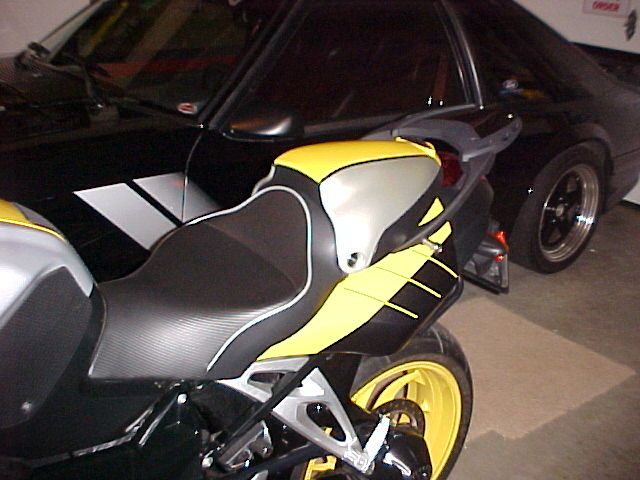
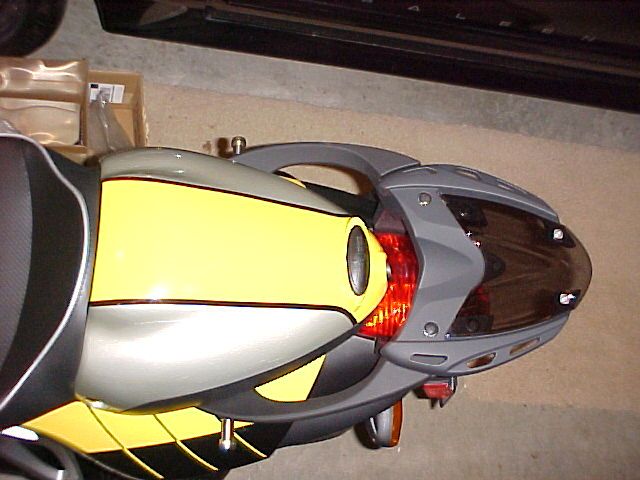
A few pics of the finished product:
The Sargent Pod still functions, as it was intended. You can still lock and unlock it, as well, although the luggage rack does get in the way. So now you will scrape your knuckles, when you unlock your Pod, as well as when you remove your seat!  :lol:

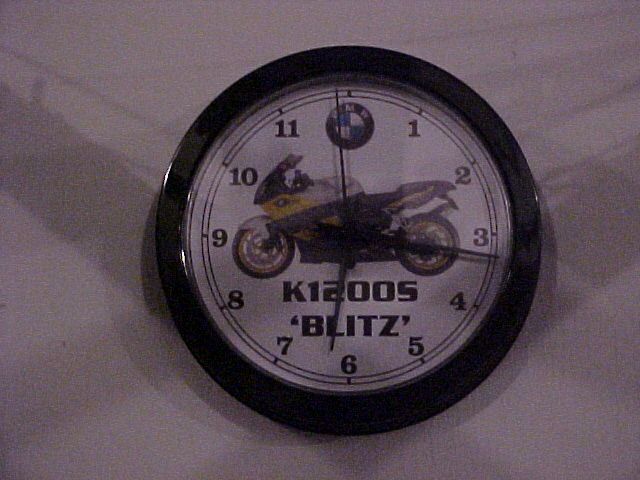
Bonus pic of my inexpensive eBay clock:
BTW, the loudest ticking clock I have ever heard, glad its in my garage!

Monday, October 22, 2012

BMW K1200s Exhaust Upgrade to K1300S Spec.

There is a lot of misinformation on the internet, about the K13 exhaust, not fitting the K12's.  I did my own research, and found a couple of threads about a rider from the Netherlands who swapped out the K13 can, to his K12, with no difficulty. The question was raised as to why would someone do this swap? Well, for several reasons! The K13 can is infinitely better looking than the giant K12 can. I have heard the K12 can called a 'howitzer' a 'bazooka' and worst a 'rhino dildo'! Unfortunately, all three are accurate descriptions. The K12 can is also more than twice as heavy as the K13. The K13 just plain sounds better! The stock K13 uses the motorized flapper valve to control sound. Without the valve, the K13 can has a nice deep throaty rumble, vs. the K12's whisper quiet, silent exhaust note. Most riders like a bit of rumble, and aural feedback, from their exhaust, I know I do. With the stock K12 exhaust note, I felt that I was missing one of my riding 'senses', not being able to hear the engine, properly. The last reason for the swap is the cost. A decent slip on can costs $800 minimum. My choice for the best slip on is the K13 Akrapovic can, which sells for the reasonable sum of $1400!!? Out of the question! So I went for the K13 'upgrade' instead.
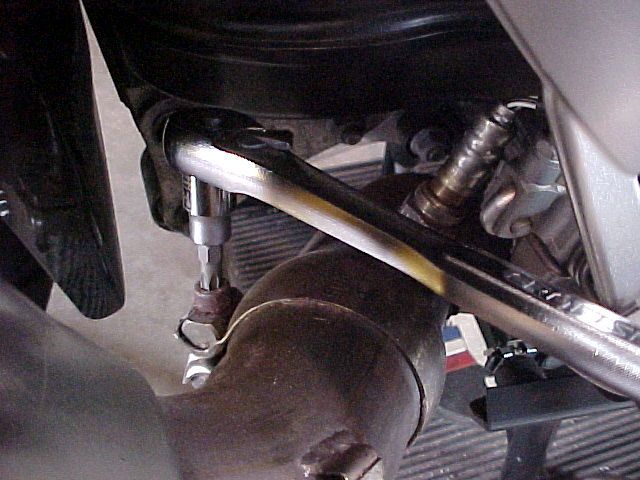
A BMW Superbike forum member here gave me a good deal on his very lightly used exhaust can, to begin my project. Removing the can is remarkably easy! First you have to remove the heat shield, which on the K12 is only one single bolt, and two slide-in tabs. Next, undo the band clamp that holds the can to the header. It does not have to be removed, just loosened enough to slide it back, off of the exhaust can flange.

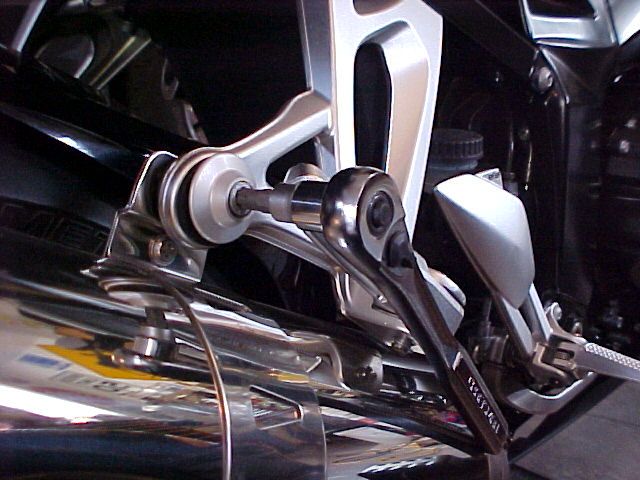
Then the bolt that holds the can to the rear foot peg can be undone.

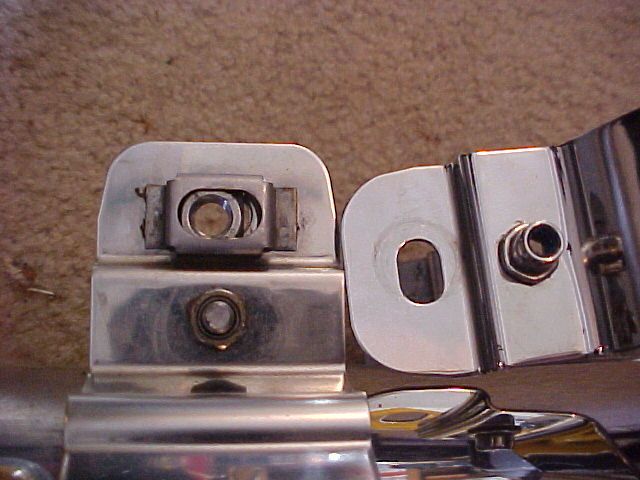
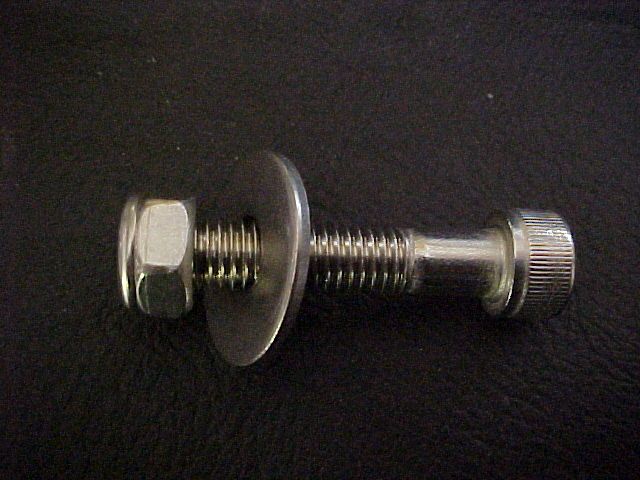
Thats it, now the can is just hanging in place and can be removed. Be careful! The stock K12 can is very heavy! lol You will need an M8 bolt to attach the K13 can to your K12. The K12 howitzer has a captured nut, in the clamp, the K13 uses a flanged nut to hold the can on. I opted for an entire bolt/nut/washer in stainless, as I did not think that the OE bolt would be long enoough. FYI, the K13 uses the same short length bolt to hold the stock can in place.


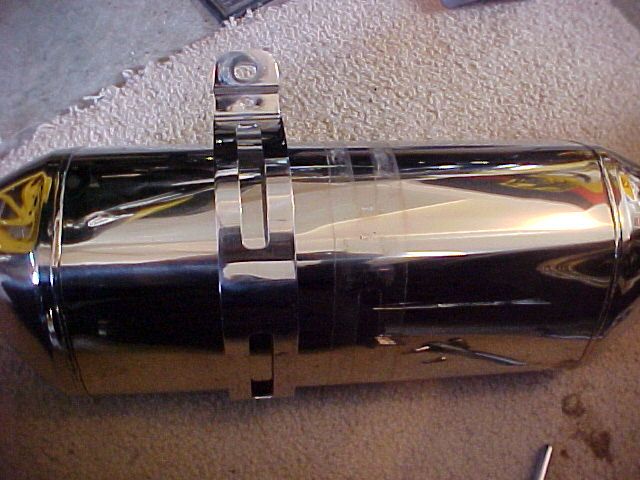
The clamp/strap that holds the K13 can on, will have to be moved rearward, nearly 3". The difference is that the K12 header is 70mm shorter than the K13 piece. The extra length is to accomodate the servo controlled flap and housing. The housing covers a strong spring, which holds the flap open. The servo motor pulls the cable, closing the flap at idle and part throttle positions, i assume. This extra length is well-documented, and why internet experts make the incorrect assumption that the K13 can will not retrofit on the K12.

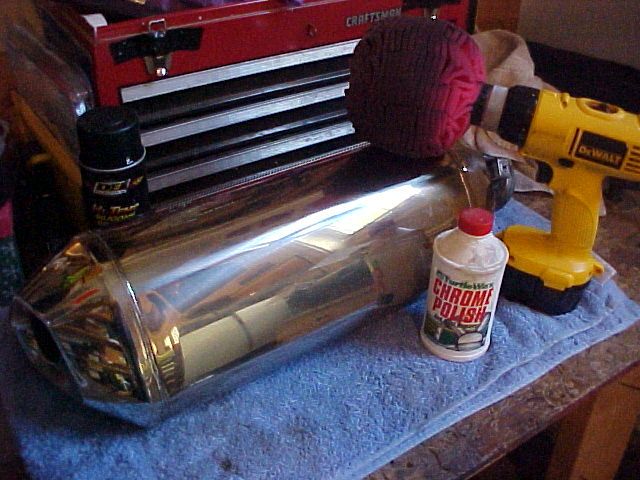
As you can see, there is a visible witness mark, where the strap used to be, from dirt, chrome polish, rubbing etc. I took my Mother's Power Ball and chrome polish to my new can, to remove these marks. Luckily, they came off easily, from the front, visible side, not so much from the backside. Probably because the front is generally kept nice and clean and polished up, the rear, not so much.

Next, I fitted the can in place, to check for clearance. I was a bit concerned to see only about 5/8" gap between the can and tire!
So I put the K12 bazooka back in place, for a reference. I was delighted to see that the stock pipe had the same, narrow gap! So no problem there. Finally I just bolted on the band clamp, and my new stainless bolt/lock nut/washer assembly, and checked my work:

The K13 can sits a bit forward, to my eye. Probably just because I am used to the look of the K13 can, in the stock location, 70mm further back. It does look very modern, with a smallish can, mounted forward on the bike. Think new Ninja ZX14, and you get the idea. I am not sure if I am going to leave it this way, we'll see. It sounds fantastic, BTW! It has a nice throaty, deep rumble, reminescent of an aftermarket can. Probably due to the elimination of the K13 flapper valve.

Bottom line: The K13 Exhaust can is a direct fit replacement/upgrade for the K12!!!

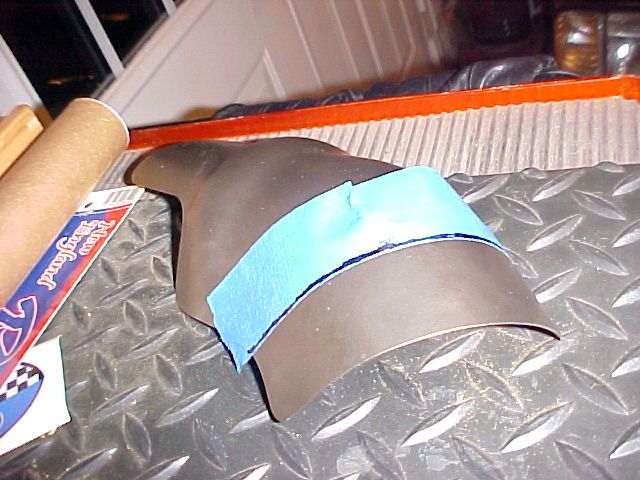
The last modification for the K13 can retrofit to the K12, is that you will have to trim your factory heat shield, by about 1.5", to fit. The shield will then bolt right on, and the tabs will slide back into place. This provides a nice, factory appearance. My shield is not mounted, in the previous pics, because I want to use a friends cut-off wheel to get a perfect straight cut. All I have on hand is a hack saw, which would provide a hack job, I'm sure! Here is a pic of the shield, with the cut line, marked off:


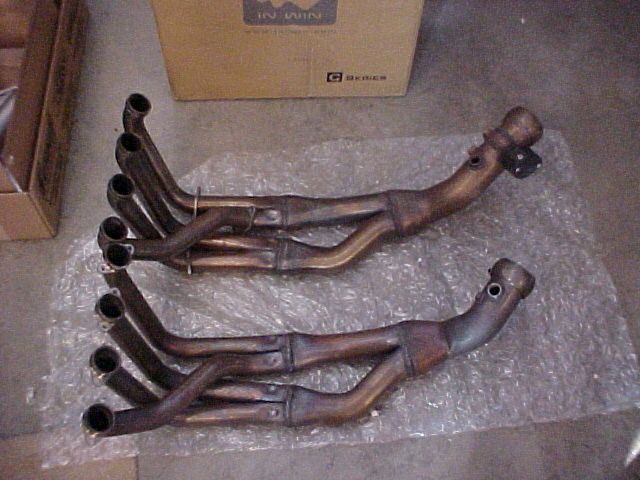
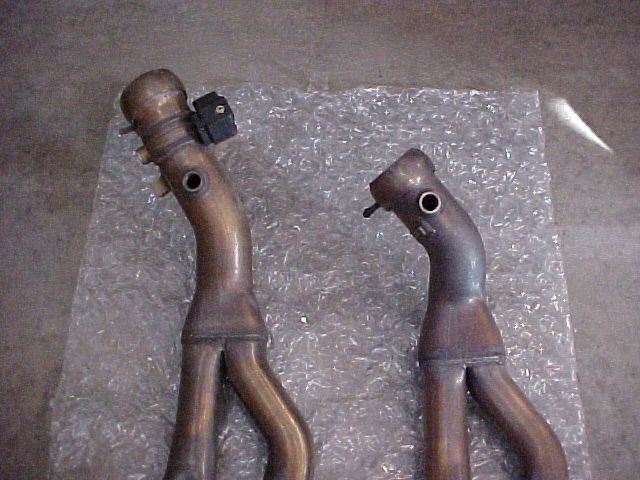
This didn't take too long, for an update to this mod! I decided that I could not live with the appearance of the K13 can, mounted so far forward on my K12. The can just didn't fill the space, visually, and it looked bad, to my eye. I also am not a fan of the modern look of a super small can, mounted low and forward on a sport bike. I despise that look, actually. I am more traditional and old school, I like a proper full-sized muffler, that fills the space, and dumps the exhaust to the rear of the bike. With that in mind, I decided that I needed the K13 headers to go with my K13 canister, to move the exhaust the extra 70mm rearward. That is almost 3" -- a lot! So I was able to purchase the header from the same BMW Superbike's forum member, who gave me a great deal. Once you see the headers, side by side, you can really visualize the differences:

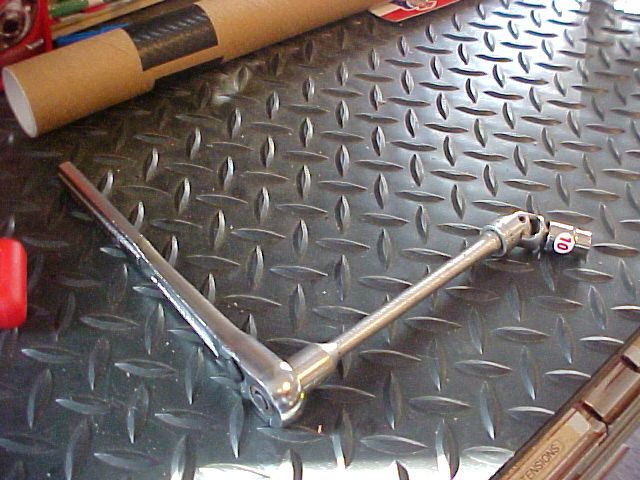
I elected to leave the K13 exhaust flapper in place. Removing it, would have been a chore, possibly damaging the pipe, and then there would be holes to be filled, either welded shut or possibly filled with bolts. The flapper valve is held open with a powerful spring, mounted on the side, in a small plastic case. I just disconnected the cable, actually cutting it, so that I could re-use the pass through nut, that fills the hole in the flapper-spring casing. Removing the stock header isn't that difficult, but it is a bit fiddly, and you are working on your back, unless you have a lift! I only removed my lower fairing, in one piece, 5 screws per side and the entire assembly slips off. To get the 8 nuts that hold the headers on, you will need a 10mm 12 point socket, an extension and a universal, will be your best friend. Realistically, this is the only way to access the center-most nuts:

The Header bolts only reguire 22 ft lbs of torque, hard to measure with the extension and universal, I just made sure that my bolts were well-tightened. The bolts appear to be made out of a soft brass or similar, so great care is recommended, here!
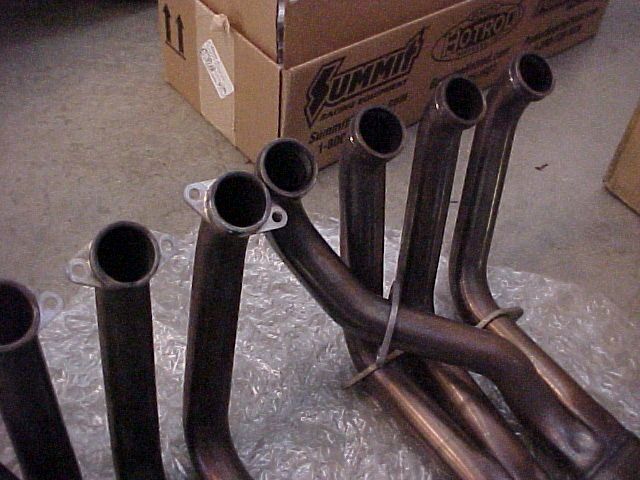
The K13 header has loose flanges, as opposed to the fixed ones on the K12 stocker. I am not sure why they did this, I assume it was for ease of assembly, in the factory. I never had any issues with the K12's fixed flange, but I don't have to bolt on hundreds a day!!

Overall, a pretty easy swap, and the K13 parts are direct bolt on, and everything fits, no problem.
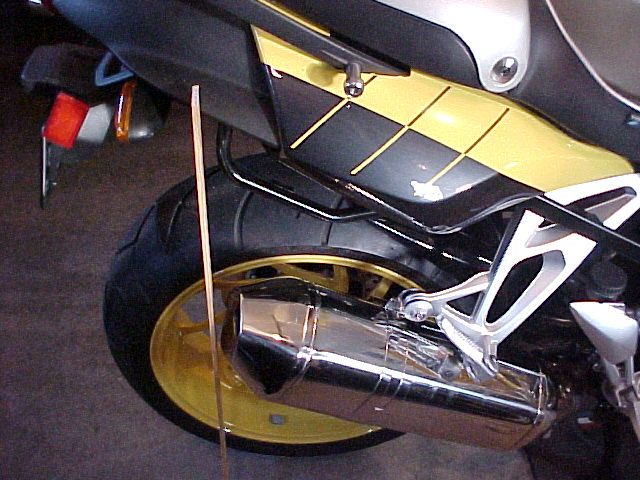
Here are a couple of pics, with the exhaust mounted. I used the wooden slat, so that a visual line can be seen, as to where the rear of the can is in relation to the bike itself. First is with the factory K12 header:

Now with the full K13 header and can:

Now a couple of pics of the finished product, full K13 exhaust and heat shield, which the seller graciously included in the deal!


You can also see, from the K13 can's relation to the wheel, that it is further angled upward, and toward the rear of the bike. It just looks better, as it was designed by BMW, in my opinion. 
I think it looks great! Really helps to update the looks of the K12. Any exhaust canister, aftermarket or K13, is a huge upgrade over the stock Howitzer! With the K13 header in place, the sound is unchanged, to my ear. The flapper valve is held open, so you are getting the full K13 can, wide open, at all times. I am not sure if the added 70mm length will alter the HP characteristics of the K1200. For street driving, i believe that you would never notice. In a race application, I know that adding and subtracting length to the exhaust header can make noticeable differences. I am not going to spend any time worrying about trace amounts of HP and torque gained or lost, lol!!

Monday, August 13, 2012

MTX ThunderForm Subwoofer Installation 2006 F150

Over the weekend, I tackled my Thunderform install. Pretty simplistic unit, especially when compared to some of the systems on this forum! For starters, MTX's instructions are pretty much useless. There are huge glaring errors, and they are very basic, meaning they make blanket statements, with no guidance, no description, no actual instruction. Hopefully my trial and error install will help anyone using the Thunderform. I should mention that I have a 2006 Supercab truck, for reference. 1st thing I ran the wiring 'harness' lol. The wires all tuck nicely, behind the seats, just under the carpet lip. Getting them in there, behind all of the seatbelt brackets etc. was alot of fun! I actually rubbed the skin off of a couple of my knuckles, stuffing my hands in and out of that tight seat joint, about a thousand times! I found a nice grounding point, on one of the bolts that holds down the jack.
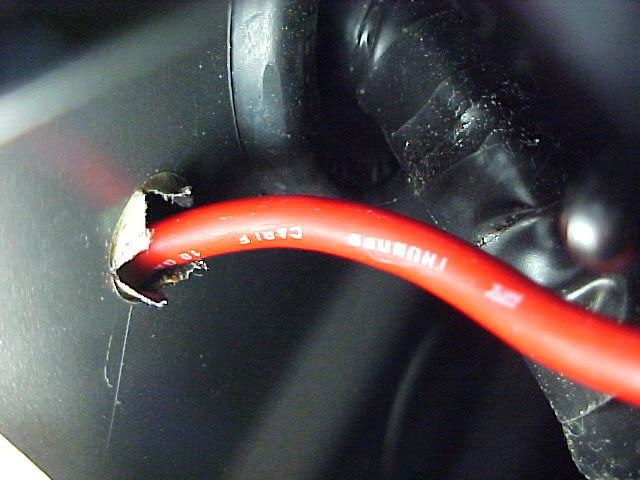
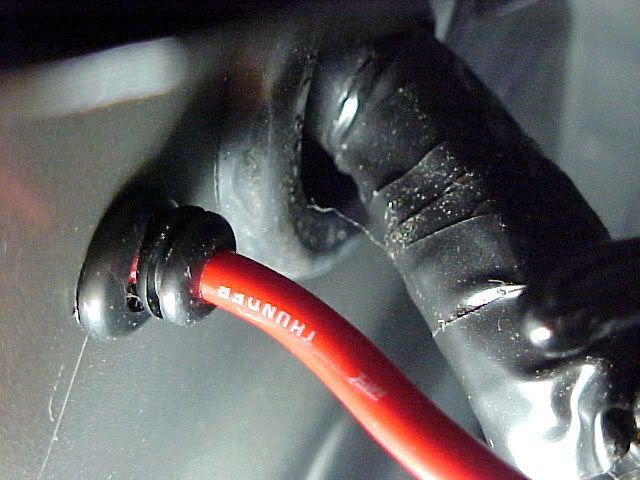
I spent the better part of an hour, banging my head into the wall, trying to route the power wire into the engine bay, up to the battery. I did not want to drill any holes in my brand new truck! I noticed the antenna wire going down into the fender, and it could (somewhat) easily be seen, up under the passenger footwell. I thought if worse comes to worse, I can enlarge that hole, and install a new grommet. Turned out to not be necessary. Once the splashguard was moved out of the way, I found a nice 3/8" hole in the firewall, just under one of the main wiring harness holes/grommet. It is unused, and is only covered with a sticker.
I installed a couple of grommets on the power wire, to ensure that no water or whatever, found its way into the passenger compartment.
Next, I routed the speaker wires. These simply tap into the existing rear speaker wires, making it unnecessary to run lines up to your head unit. I'm 99.9% sure that the factory head unit does not have RCA outputs, at any rate. The MTX directions state that the speaker wires run under the drivers side threshold?! Hmmm, doesn't make sense to me, but I stupidly run both sets of RCA cables over to the drivers side. I know, I'm an idiot. I am only able to finde the LH speaker wires, of course, the RH wires are on the passenger side threshold, duh. Thats what I get for taking these 'directions' too literally. Meaning I have to reroute the passenger side RCA cable, meaning a couple more mm of knuckle skin worn off! After that, It was smooth sailing, the box screws right in snugly, and actually sounds quite good for what it is.
I nearly forgot to mention, I mounted my remote speaker volume knob, in the center console. Again, no way I was going to drill out the dash or wherever for this (kind of cheesy) knob. Also, there was no way I was attempting to run any more wires, any further than I had to. I give Ford credit, this truck is well put together, this was one of the harder installs I have done. Simply because there isn't much space, and things don't just come apart easily etc. Here's the volume knob:


My post isn't meant to replace the instruction that MTX provides, merely augment them, since they are woefully lacking. Hope this helps.

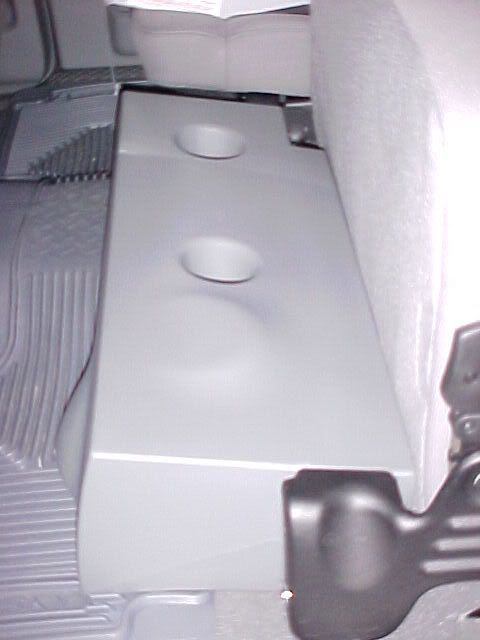
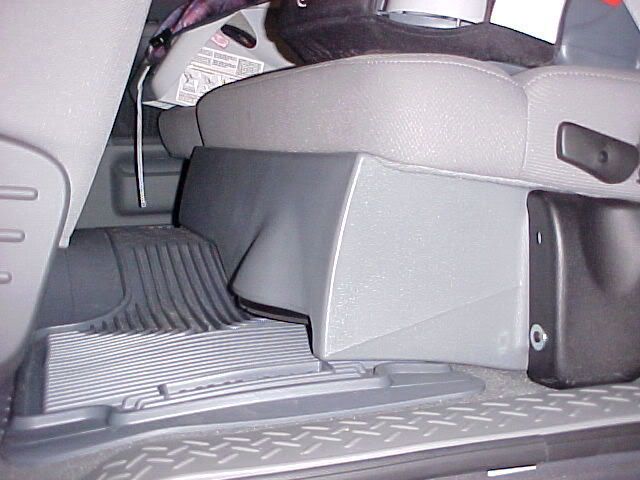
Here are some pics of the final install:

Wednesday, August 8, 2012

I just took apart my sport panniers, in preparation to paint them. It was a bit 'fiddly' figuring out how they come apart, but overall it was quite simple. Here are the steps:
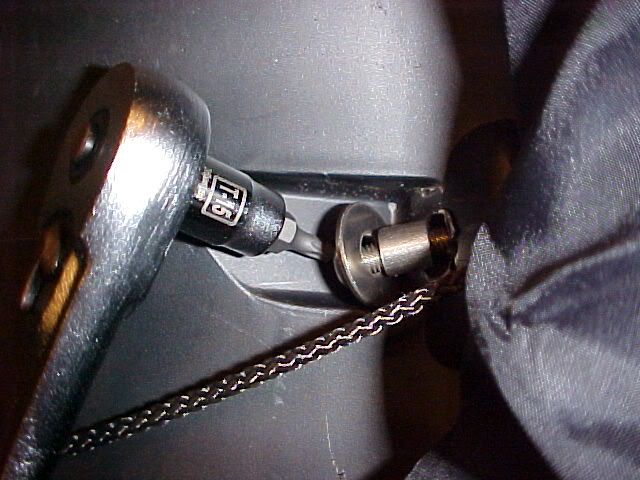
1. Inside of the case there are two small torx bolts that appear to be holding the lid string stays in place. Remove both of these, they have nothing to do with the strings, and they actually hold the black plastic case protectors in place. Take care with the small parts, as there is also a metal insert, in the lid that the bolt goes through, that will be loose.


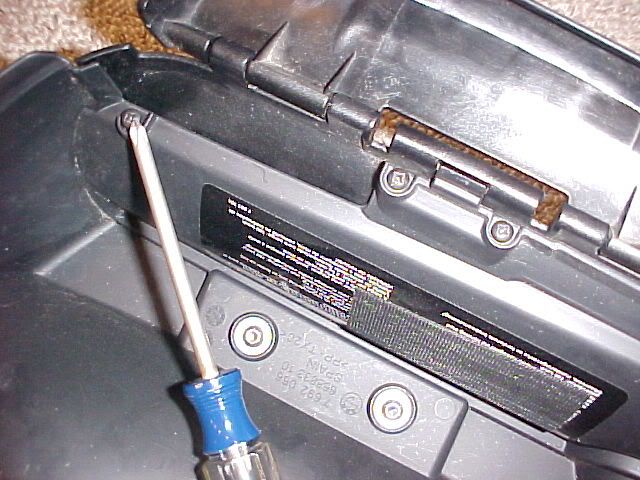
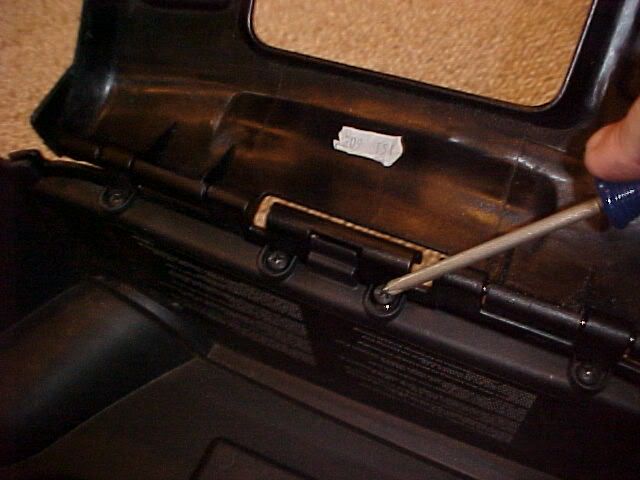
2. Once the bolts are removed, the black plastic case protector can be swung out of the way, exposing the inner hinge. There are four phillips screws in the inner hinge crevice, remove them. On the left pannier all 4 are located in the hinge cavity. On the right hand pannier, three are in the hinge area, one smaller screw is inside the case. Unsnap the string stays from the inner case, now the entire lid and the black plastic protectors can be removed as an assembly.


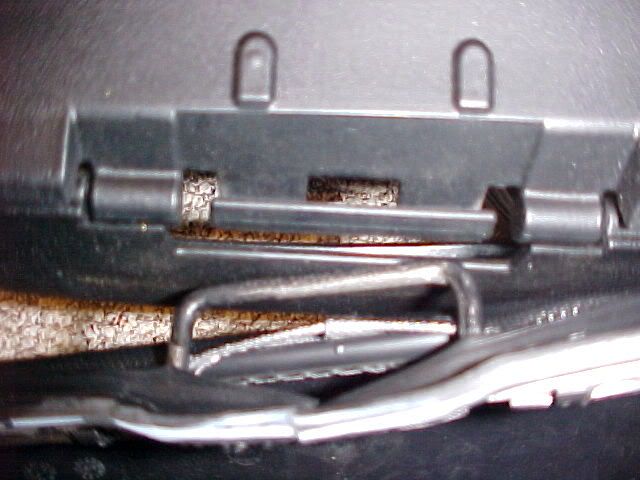
3. The black case protectors can be separated from the lid by separating the two hinges. The grey lids hinge is just a portion of the metal rod that the lid uses for strength. It takes a little bit of manipulation to separate the rod from the black case protector hinge, but once they are apart, you are done.


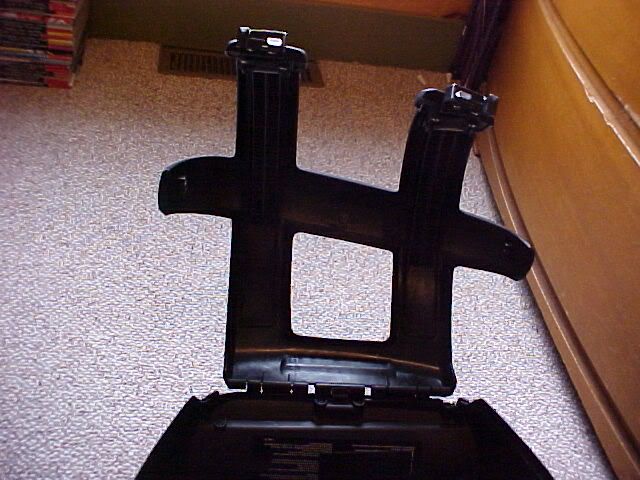
Here is a pic of the case protectors, swung out of the way, once the top/lid portion of the panniers has been removed:


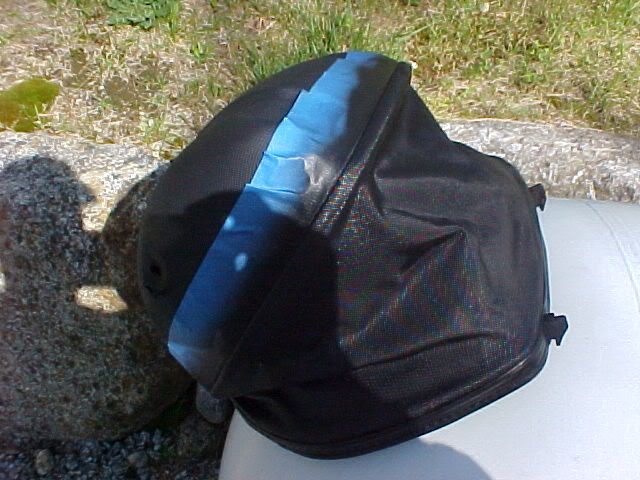
Now you have just the grey lid portion, ready for painting. The expandable vinyl portion does not appear to come off, and looks to be sewn on. This will have to be masked off, unless you plan on painting it as well (with vinyl dye or similar).
I am going to use a black satin plastic fusion paint on mine. I am undecided as to whether or not I am going to dye the vinyl expansion portion black or not, so I am looking for opinions? Thanks.

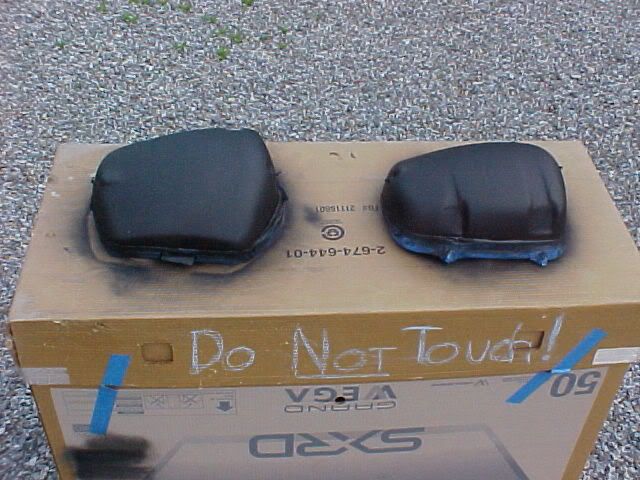
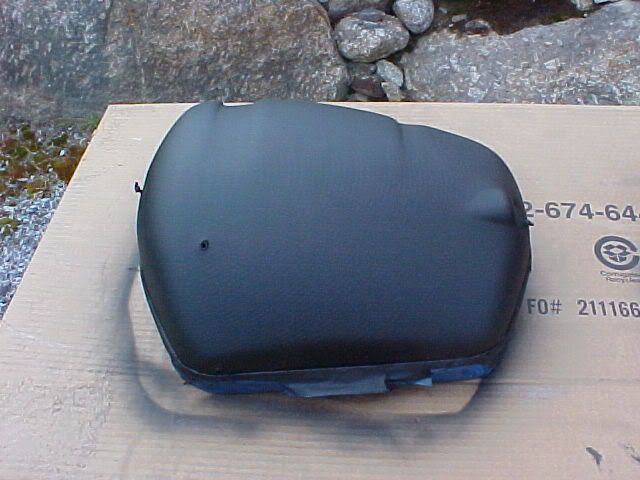
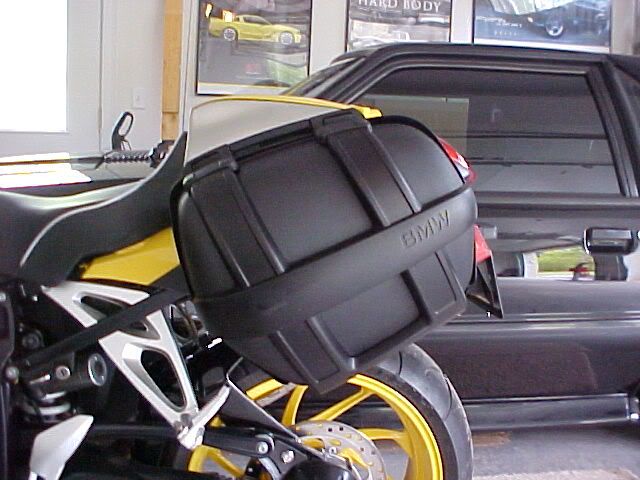
I painted mine up today. The weather was beautiful, around 70 degrees with no humidity. I took my sport panniers apart, and masked them off. Then I cleaned and degreased them. I gave them a light scuff with a red Scotch Brite pad, even though the surface is quite textured, already. Then I cleaned them again and again and again. I used Duplicolor adhesion promotor then Duplicolor flat black acrylic enamel. Multiple light coats of each. The paint job came out, fantastically, if I do say so myself! I haven't decided if I am going to use black vinyl dye on the grey expandable portion of the panniers. I do not intend to run the panniers, in their expanded position, ever, so I may just leave it, as a slight contrast. We'll see once I get them put back together. This project was very easy, and I would recommend it to anyone, with even the most basic DIY skills!
I snapped a couple of pics:


ps. The 'Do Not Touch' is for my kids, from a previous project, left drying in their line of fire, lol!
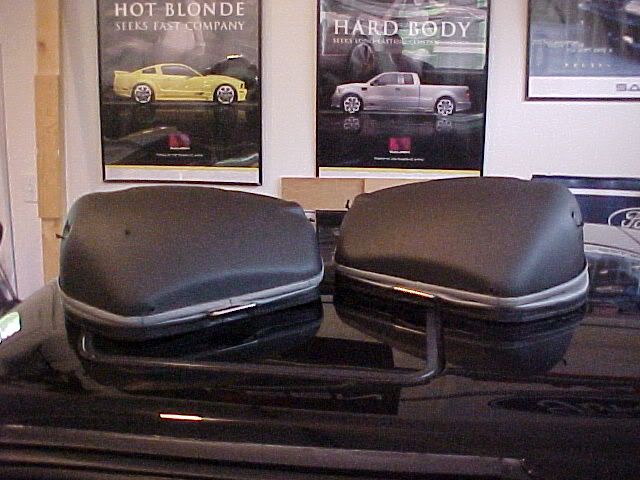
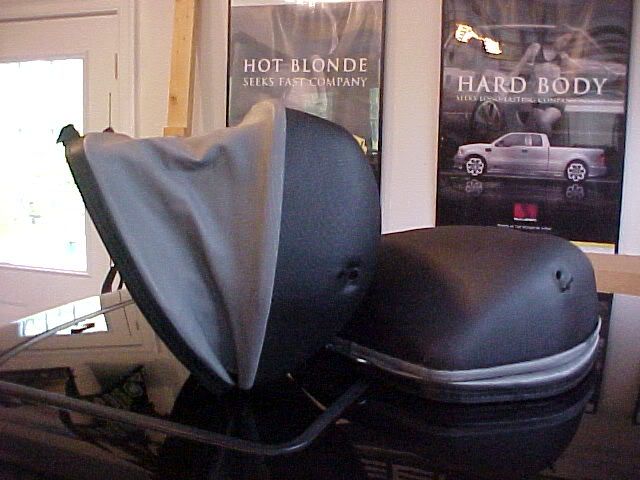
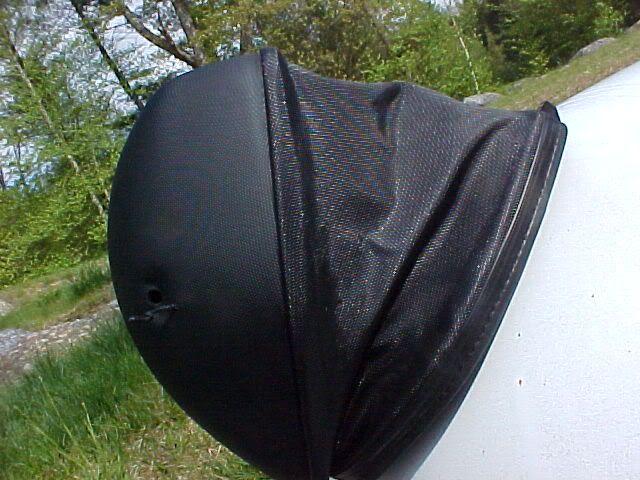
I am still torn on whether or not to use the black vinyl dye on the expandable grey vinyl portion. I definitely do not like the contrasted look, from the flat black case, to the grey/silver liner. However, they will not show, when the cases are closed up. Lastly, now is the time, if I want to dye the vinyl black, while the cases are all torn down. I also have to wait for good weather! Although yesterday was beautiful, rain is forecast for the rest of the week.  :( I'm certain that the vinyl will accept the dye, very well, and most likely that is the route that I am going to go with. Here are a couple of pics of the case tops, with the masking removed:


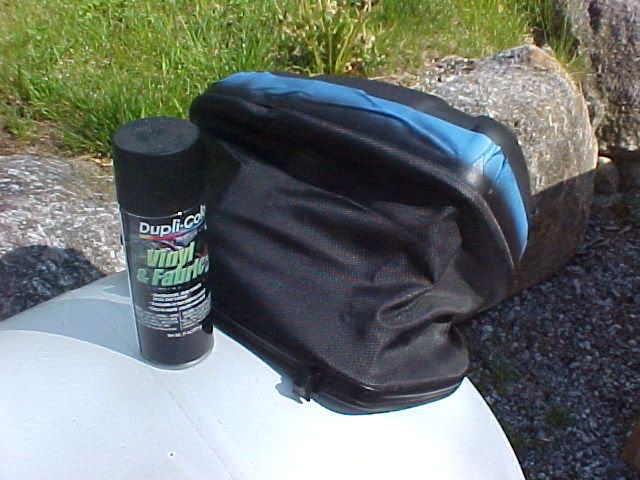
I got the expandable grey vinyl painted up today. The weather wasn't quite as nice as I would have liked, as it was only 60 degrees. However, I put the cases in the direct sun for a while, and the new black paint heated up quite nicely. The Duplicolor vinyl and fabric dye is very easy to use, and also very forgiving. The dye is super thin, as it is designed to sink into and penetrate the vinyl, as it is a dye, not a paint. It will run, so multiple thin coats is the way to go. You have to make sure that you are starting with a very clean surface to dye, as well. I know the pictures are grainy, but the final product looks great! Here are a few pics:


The next installment will be a 'prequel' with pics of the assembly, in reverse, added to the post, describing how to take apart the panniers. This thread, when completed could be moved to the 'How To' section, as there is precious little out there about our high tech expensive panniers.
Here are a couple of 'top tips' for re-assembly; the cases [u]must[/u] be re-assembled in this order! Refer to the disassembly pics, for reference!
1. Screw the exterior case protector to the bottom of the back half of the case. Only re-install the two outer screws at this time! The two inside screws need to be left off, so that the case lid will still easily snap back into place. The two inner screws hold tension against the plastic tab that holds the hinge in place. (I removed the two inner screws, once I figured this out, lol!)

2. Now manipulate the metal rod/hinge on the cover into place, snapping it into the plastic side of the hinge, on the backside of the case.

3. Re-install the two center phillips head screws on the hinge panel. A right angle phillips head or phillips head socket makes this step easier, just take care not to strip out the screw heads, as they are now obstructed by the case top/lid.
4. Re-install the two t-15 torx bolts/spacer/washer assembly on the inside of the case, which hold the exterior case protector in place. Some pressure may need to be applied to the case protectors, to get the holes to line up.

5. Snap the string stays back into place and you are done!

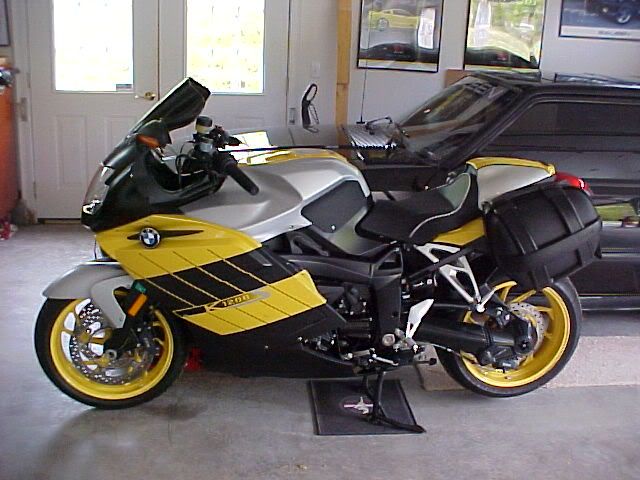
And the final product:


Definitely interested in feedback, and success stories, if anyone else out there does this!