Thursday, November 29, 2012

Custom K Bike Stands for Winter Storage

When I first got my bike, I viewed a set of stands as a necessity, for working on the bike and, more importantly for stable Winter storage. Being naive, I began searching the internet for BMW K bike stands. Imagine my surprise when I discovered that any decent set cost in excess of $600!! I guess I was just spoiled by years of simple sport bike stands costing around $150 a set! I already had a brand new set of T-Rex stands, from my previous Ninja, that were brand new. They are well-built, heavy duty stands, that should be more than capable of holding my K1200S a few inches in the air. I did not want to pay $600+ for a set of stands, and I figured with a little ingenuity and fabrication, I could make my excellent stands, already on-hand, do the trick.

The first thing I did was fabricate a bar, to go through the BMW swingarm, that would, in a sense, provide two mounting/pivot points for the standard sport bike stand. I cut down an old Mustang axle that I had laying around (free) to the proper length, and gave it a try. I also had a local machinist cut two grooves, on his lathe, for the bar to rest perfectly in the stands 'claws'. The diameter of the axle is only 1.25", which I thought would be fine. What I didn't count on is that the bike would not sit level on the small diameter steel tube, it wanted to lean, to the passenger side, and 'rock' on the small diameter steel bar! Quite a pucker factor the first time I tried it out!! Luckily, the bike was still held, somewhat stable, albeit leaning precariously to one side! With the help of my wife, for assistance, I was able to get the bike off of this leaning perch. I realized that the bar, going through the final drive and swingarm, needed to be the same diameter as the pass through, (around 2.125) duh!! The bar would also have to have a smaller diameter, at the ends to sit in the stand's claws as well. Fortunately, I found a place that sells 1' and up lengths of all different types of metal, on line. There was a piece of round stock that measured 2.125 on the outside and exactly 1.25 on the inside! With shipping it was less than $50, if memory serves. I tried this combination out and it worked, perfectly. I was able to tap the axle tube, into the new, thicker stock, and it was a tight fit! Bear in mind this stand is only for storage, and a more permanently stable platform. Obviously it will not work for any type of wheel or final drive type of service. I have since purchased a Black Widow single side swingarm stand for these duties. Or I can use my center stand, lol! Here is a pic of the bar:

And a pic of the stand, with the bar, off of the bike:
Finally, the rear stand, holding up the bike:
Since I had finally licked the rear stand, I moved on to the front. Surely this would be much easier! As it worked out, the stand, worked correctly, as it was intended on my K1200. Meaning that the standard two padded lift point (2 per side) will properly lift the K bikes, well off of the ground. This accomplished by setting the stands mounts at the bottom of the front wheel 'forks' if you will. Taking extreme care as not to pinch the ABS wire that is neatly tucked right in the way! This arrangement would be fine, short term, for working on the bike, removing the wheel etc. However, I was looking for something more permanent, and stable, like I had done on the rear. I decided to pick up the bike from the front wheels center, pass-through hole, similarly to what I had done at the rear. Luckily (again) the T-Rex stands came with a variety of lifting pins, and I was able to convert one of them, by removing the thick pad, and it slid directly into the right hand side of the front wheel. The left hand side has a smaller diameter, and would require a longer pin, as well. I adapted a large grade 8 bolt, by drilling it for a clevice pin. I would need to be able to slide this bolt, in and out of the wheel, to set-up and then remove the stand. A simple arrangement, really, and it works well, and is extremely stable, as I required. I added the military spec tape, just to prevent scratching from the hard, bare metal pins, as they slide in and out of the wheel. Here are the pins:

The entire stand:
And holding the front wheel up in the air; not quite as high as lifting from the forks, but high enough:
Finally, the entire bike, with both stands in place, ready for her long Winters rest!
All in, including the original purchase price of the T-Rex stands, and the new bits, I am only in for about $175 -- Bargain!!
Bonus pic of my Wunderlich 'Tornado' final drive cover. IMO, the nicest piece available for our bikes, and certainly the best built. I painted mine black, to match my frame. It stinks that most accessories, such as these are available only in silver or titanium grey. These bikes are available with (best looking color) black frames too!!


Monday, November 19, 2012

BMW K1300S Luggage Rack Installation - K1200S


I recently mounted the K1300S luggage rack, to my K1200S. Honestly, I did this as much for the looks, as for the added carrying space. To me, the rack looks like a spoiler, mounted to the rear of the bike, and extending the bikes's length, at an upwards angle, to the eye. I bet Andy Sills could have added 5 mph to his Bonneville top speed run, with one of these mounted, lol!!
This may not even be worthy of a thread, since the installation is so straight-forward and easy! Some pic- sharing and couple of helpful hints and tips, if nothing else. Here are a couple of pics of the assembly, right out of the box:

Check out the black headed filister screws, included in the kit! I didn't think that BMW had the technology to make bolts with a black head, lol! Just an FYI, these bolts mount the grab handles to the frame, and are not even seen! If only BMW could make replacement torx head screws in black for our bikes...

The installation instructions are quite simple. First, remove the seat, then remove the taillight assembly. The taillight is held on with a single screw only, and then a couple of friction fit slide pins. Slide the taillight to the rear, for removal. It is not necessary to unplug the taillights wiring harness.

Next, you unbolt the stock OE grab handles from the frame. There is one bolt to the front of the handle, and two bolts to the rear, holding each handle in place. There is also one smaller bolt, per side, which holds some trim, and also the handles in place. The frame bolts come out hard, because of the thread locker, applied to them. Take your time to avoid stripping the frame threads!
Front bolt:
And the rear bolts:
The new, longer handles mount in the same spot as the originals, using the new bolts, from the kit. (the super nice black headed bolts with thread-locker applied.) I just want to take  moment and say that the OEM BMW accessories are really top-notch. I have never had even one single issue, when installing a BMW factory accessory. Here are a couple of pics of the differences in the grab handles:
*Tip* Once the handles are installed, it is time to re-install your taillight. If you wait until after the rack is installed, you will have to unplug the taillight, and put it back on, from the rear. Finally, the rack is unbolted into two pieces, and the lower structure is bolted on to the grab handles.

The  little black plastic caps, cover the bolt heads, that mount the clear rack, to the assembly. They go on super hard! I had to use a wooden dowel, of the same size, and then hit them, hard, with a mallet, to get them on. Some of the racks, mounted on earlier K13's, do not have these nifty little caps, so you see the unsightly stainless headed screws, lol. I wish that BMW had taken these steps, when producing the K12's and K13's, and used frame colored screws and bolts, for the entire bikes!

A few pics of the finished product:
The Sargent Pod still functions, as it was intended. You can still lock and unlock it, as well, although the luggage rack does get in the way. So now you will scrape your knuckles, when you unlock your Pod, as well as when you remove your seat!  :lol:

Bonus pic of my inexpensive eBay clock:
BTW, the loudest ticking clock I have ever heard, glad its in my garage!

Monday, October 22, 2012

BMW K1200s Exhaust Upgrade to K1300S Spec.

There is a lot of misinformation on the internet, about the K13 exhaust, not fitting the K12's.  I did my own research, and found a couple of threads about a rider from the Netherlands who swapped out the K13 can, to his K12, with no difficulty. The question was raised as to why would someone do this swap? Well, for several reasons! The K13 can is infinitely better looking than the giant K12 can. I have heard the K12 can called a 'howitzer' a 'bazooka' and worst a 'rhino dildo'! Unfortunately, all three are accurate descriptions. The K12 can is also more than twice as heavy as the K13. The K13 just plain sounds better! The stock K13 uses the motorized flapper valve to control sound. Without the valve, the K13 can has a nice deep throaty rumble, vs. the K12's whisper quiet, silent exhaust note. Most riders like a bit of rumble, and aural feedback, from their exhaust, I know I do. With the stock K12 exhaust note, I felt that I was missing one of my riding 'senses', not being able to hear the engine, properly. The last reason for the swap is the cost. A decent slip on can costs $800 minimum. My choice for the best slip on is the K13 Akrapovic can, which sells for the reasonable sum of $1400!!? Out of the question! So I went for the K13 'upgrade' instead.
A BMW Superbike forum member here gave me a good deal on his very lightly used exhaust can, to begin my project. Removing the can is remarkably easy! First you have to remove the heat shield, which on the K12 is only one single bolt, and two slide-in tabs. Next, undo the band clamp that holds the can to the header. It does not have to be removed, just loosened enough to slide it back, off of the exhaust can flange.

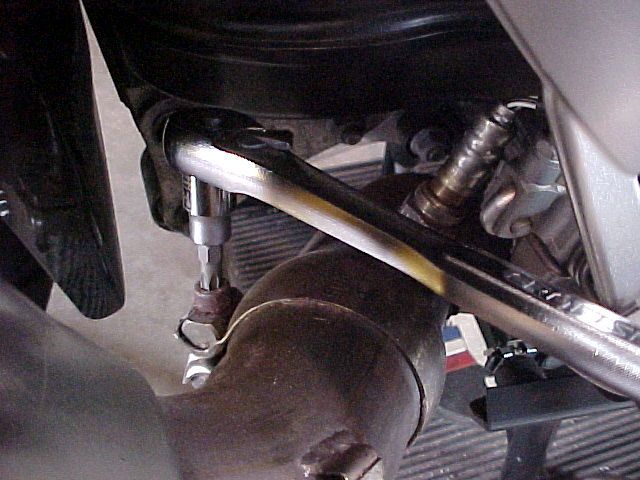
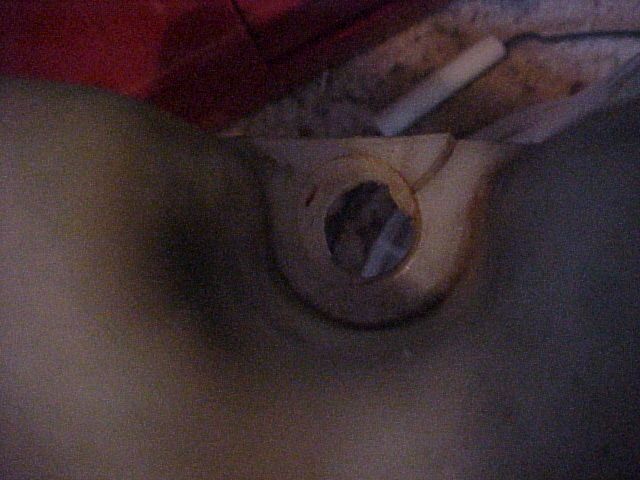
Then the bolt that holds the can to the rear foot peg can be undone.

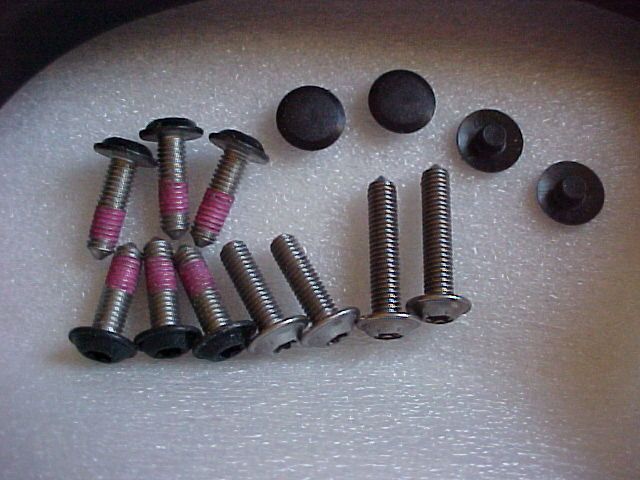
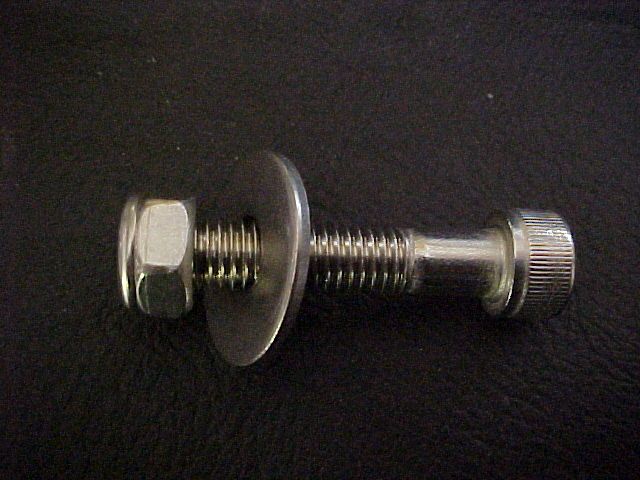
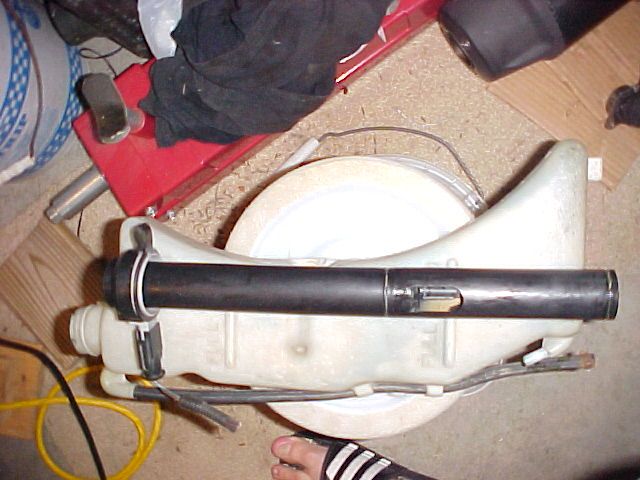
Thats it, now the can is just hanging in place and can be removed. Be careful! The stock K12 can is very heavy! lol You will need an M8 bolt to attach the K13 can to your K12. The K12 howitzer has a captured nut, in the clamp, the K13 uses a flanged nut to hold the can on. I opted for an entire bolt/nut/washer in stainless, as I did not think that the OE bolt would be long enoough. FYI, the K13 uses the same short length bolt to hold the stock can in place.


The clamp/strap that holds the K13 can on, will have to be moved rearward, nearly 3". The difference is that the K12 header is 70mm shorter than the K13 piece. The extra length is to accomodate the servo controlled flap and housing. The housing covers a strong spring, which holds the flap open. The servo motor pulls the cable, closing the flap at idle and part throttle positions, i assume. This extra length is well-documented, and why internet experts make the incorrect assumption that the K13 can will not retrofit on the K12.

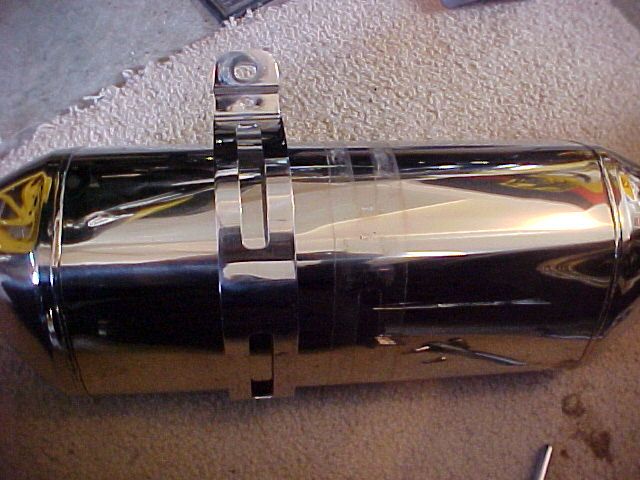
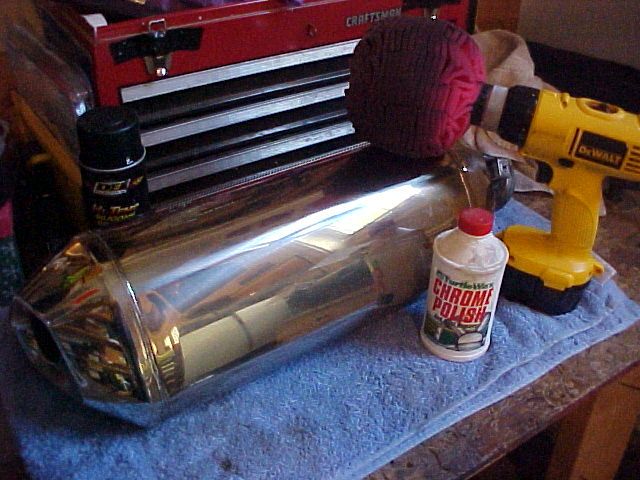
As you can see, there is a visible witness mark, where the strap used to be, from dirt, chrome polish, rubbing etc. I took my Mother's Power Ball and chrome polish to my new can, to remove these marks. Luckily, they came off easily, from the front, visible side, not so much from the backside. Probably because the front is generally kept nice and clean and polished up, the rear, not so much.

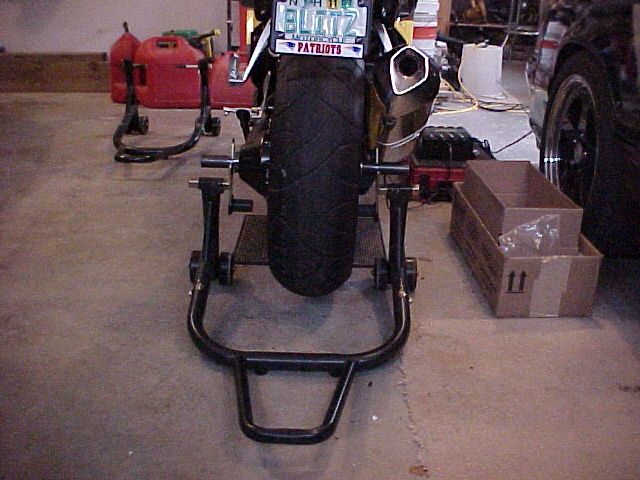
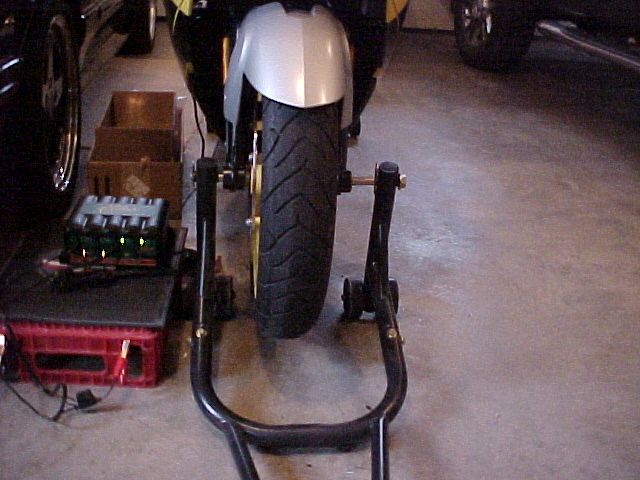
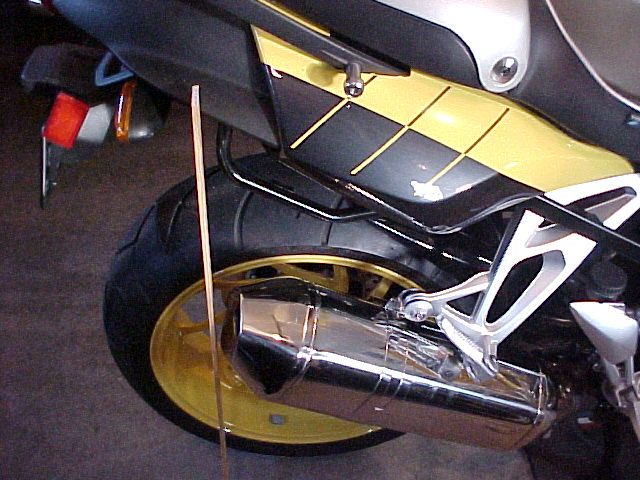
Next, I fitted the can in place, to check for clearance. I was a bit concerned to see only about 5/8" gap between the can and tire!
So I put the K12 bazooka back in place, for a reference. I was delighted to see that the stock pipe had the same, narrow gap! So no problem there. Finally I just bolted on the band clamp, and my new stainless bolt/lock nut/washer assembly, and checked my work:

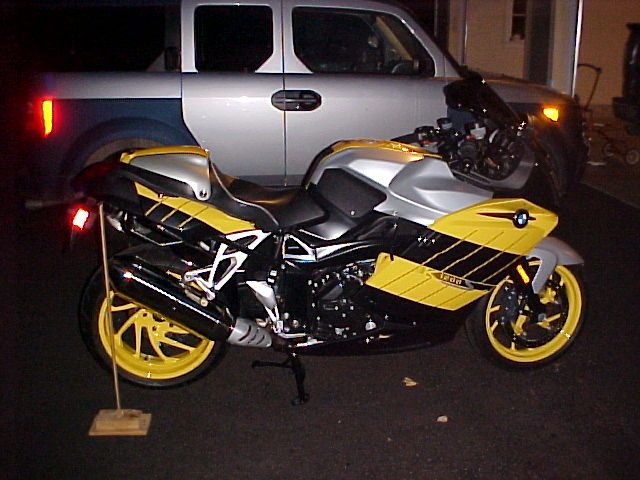
The K13 can sits a bit forward, to my eye. Probably just because I am used to the look of the K13 can, in the stock location, 70mm further back. It does look very modern, with a smallish can, mounted forward on the bike. Think new Ninja ZX14, and you get the idea. I am not sure if I am going to leave it this way, we'll see. It sounds fantastic, BTW! It has a nice throaty, deep rumble, reminescent of an aftermarket can. Probably due to the elimination of the K13 flapper valve.

Bottom line: The K13 Exhaust can is a direct fit replacement/upgrade for the K12!!!

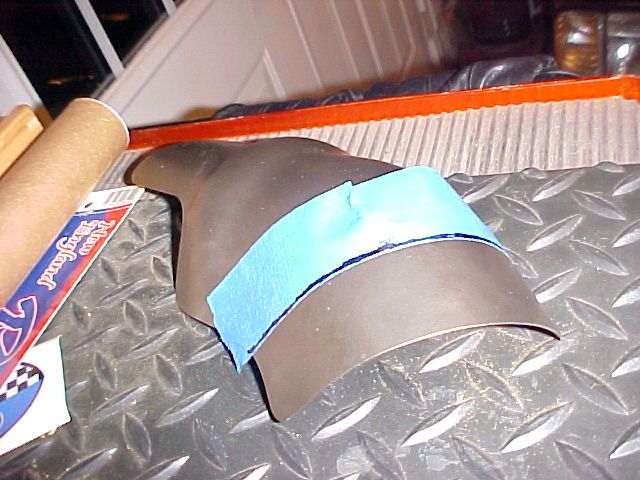
The last modification for the K13 can retrofit to the K12, is that you will have to trim your factory heat shield, by about 1.5", to fit. The shield will then bolt right on, and the tabs will slide back into place. This provides a nice, factory appearance. My shield is not mounted, in the previous pics, because I want to use a friends cut-off wheel to get a perfect straight cut. All I have on hand is a hack saw, which would provide a hack job, I'm sure! Here is a pic of the shield, with the cut line, marked off:


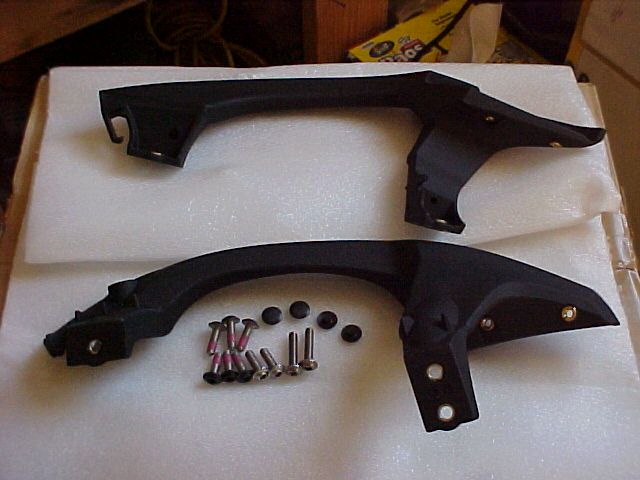
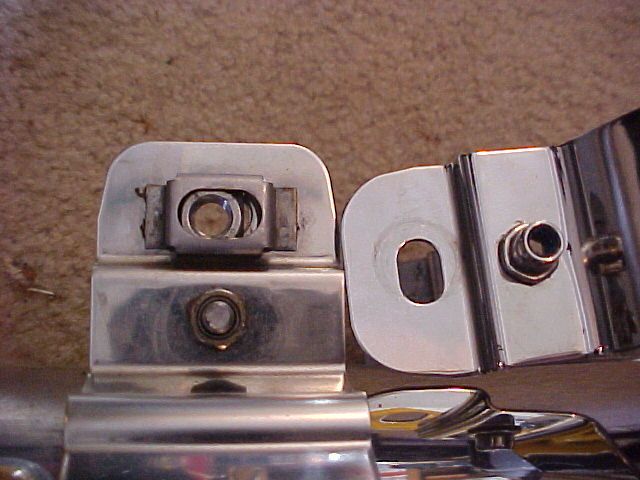
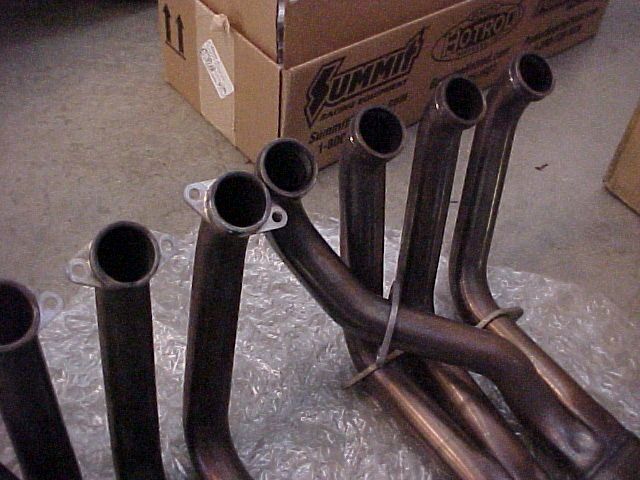
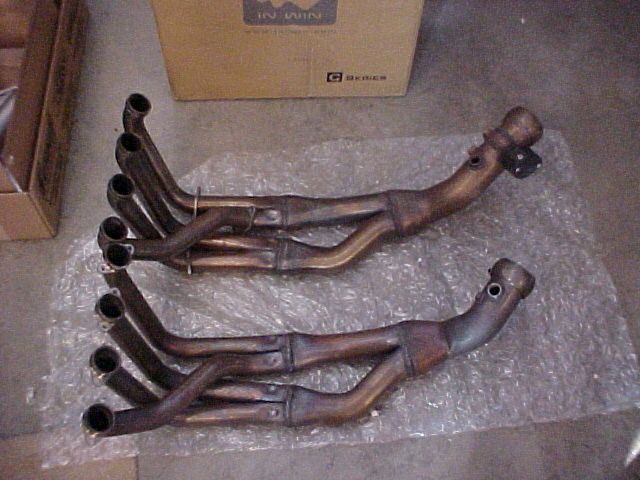
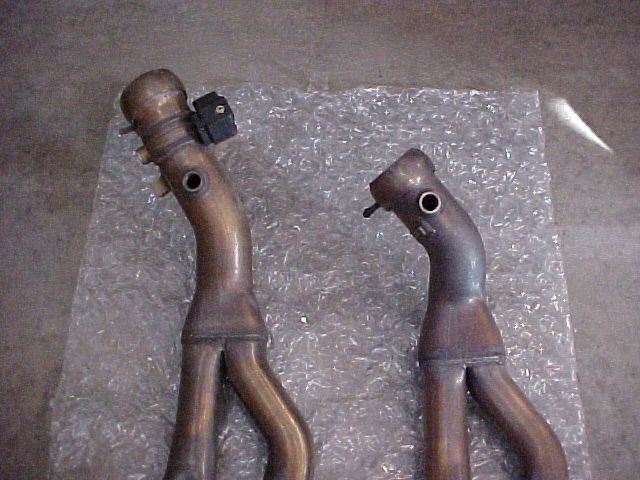
This didn't take too long, for an update to this mod! I decided that I could not live with the appearance of the K13 can, mounted so far forward on my K12. The can just didn't fill the space, visually, and it looked bad, to my eye. I also am not a fan of the modern look of a super small can, mounted low and forward on a sport bike. I despise that look, actually. I am more traditional and old school, I like a proper full-sized muffler, that fills the space, and dumps the exhaust to the rear of the bike. With that in mind, I decided that I needed the K13 headers to go with my K13 canister, to move the exhaust the extra 70mm rearward. That is almost 3" -- a lot! So I was able to purchase the header from the same BMW Superbike's forum member, who gave me a great deal. Once you see the headers, side by side, you can really visualize the differences:

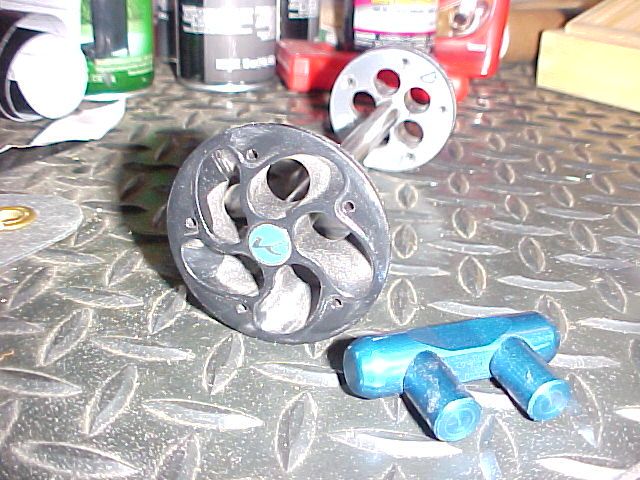
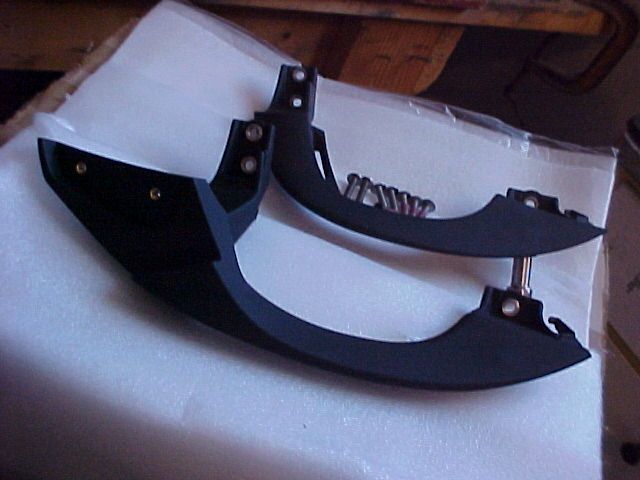
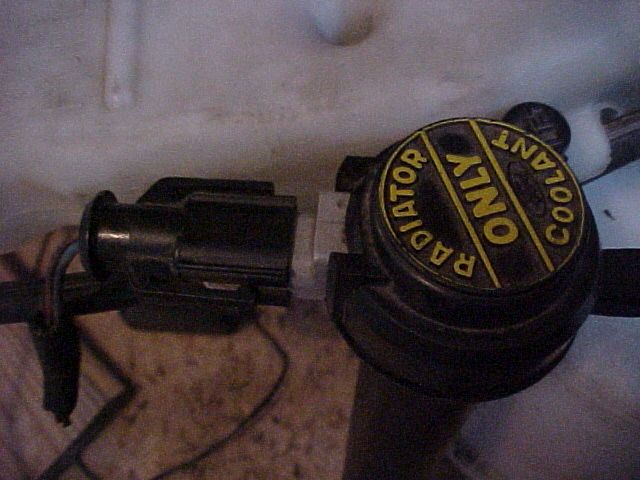
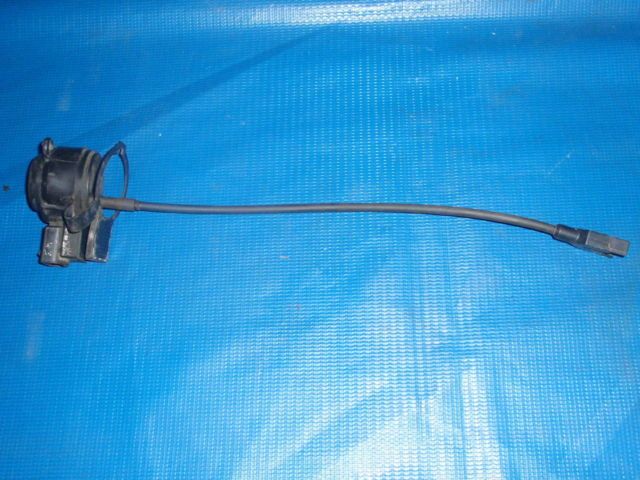
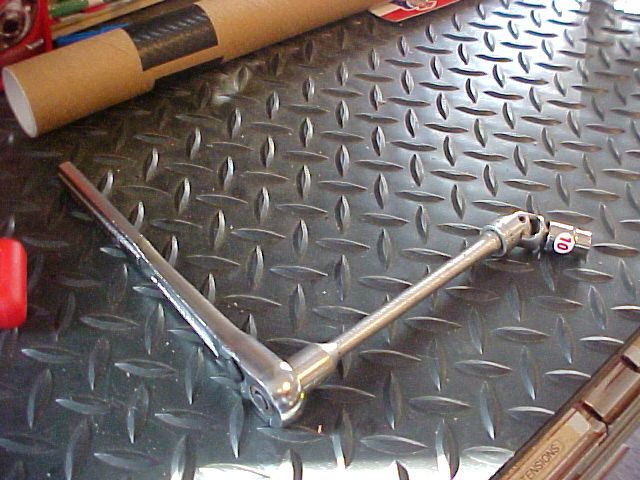
I elected to leave the K13 exhaust flapper in place. Removing it, would have been a chore, possibly damaging the pipe, and then there would be holes to be filled, either welded shut or possibly filled with bolts. The flapper valve is held open with a powerful spring, mounted on the side, in a small plastic case. I just disconnected the cable, actually cutting it, so that I could re-use the pass through nut, that fills the hole in the flapper-spring casing. Removing the stock header isn't that difficult, but it is a bit fiddly, and you are working on your back, unless you have a lift! I only removed my lower fairing, in one piece, 5 screws per side and the entire assembly slips off. To get the 8 nuts that hold the headers on, you will need a 10mm 12 point socket, an extension and a universal, will be your best friend. Realistically, this is the only way to access the center-most nuts:

The Header bolts only reguire 22 ft lbs of torque, hard to measure with the extension and universal, I just made sure that my bolts were well-tightened. The bolts appear to be made out of a soft brass or similar, so great care is recommended, here!
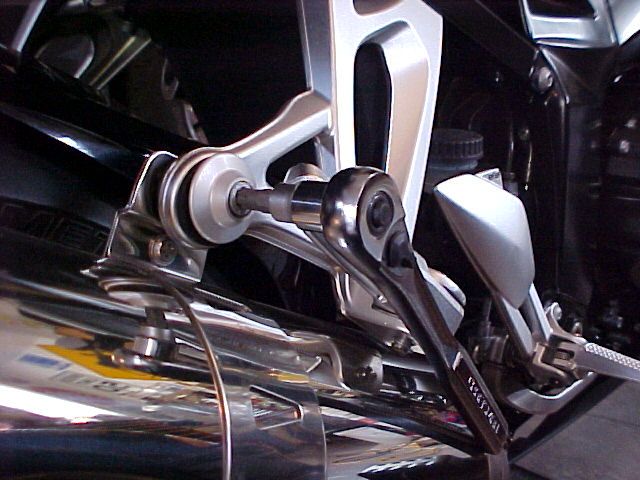
The K13 header has loose flanges, as opposed to the fixed ones on the K12 stocker. I am not sure why they did this, I assume it was for ease of assembly, in the factory. I never had any issues with the K12's fixed flange, but I don't have to bolt on hundreds a day!!

Overall, a pretty easy swap, and the K13 parts are direct bolt on, and everything fits, no problem.
Here are a couple of pics, with the exhaust mounted. I used the wooden slat, so that a visual line can be seen, as to where the rear of the can is in relation to the bike itself. First is with the factory K12 header:

Now with the full K13 header and can:

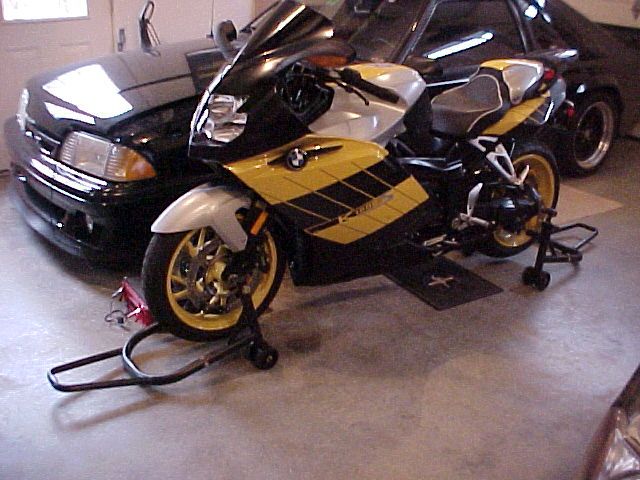
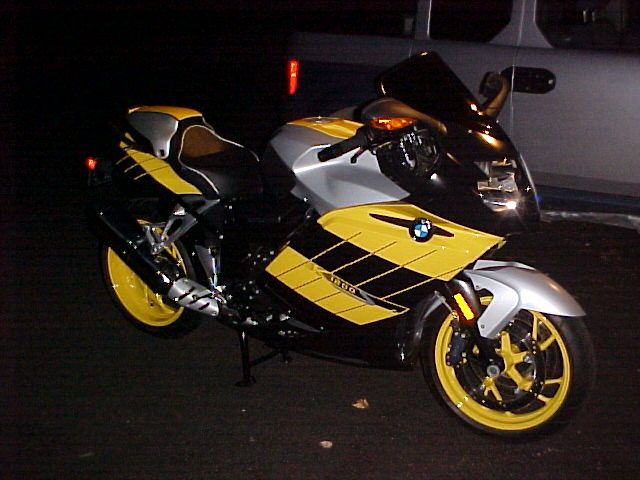
Now a couple of pics of the finished product, full K13 exhaust and heat shield, which the seller graciously included in the deal!


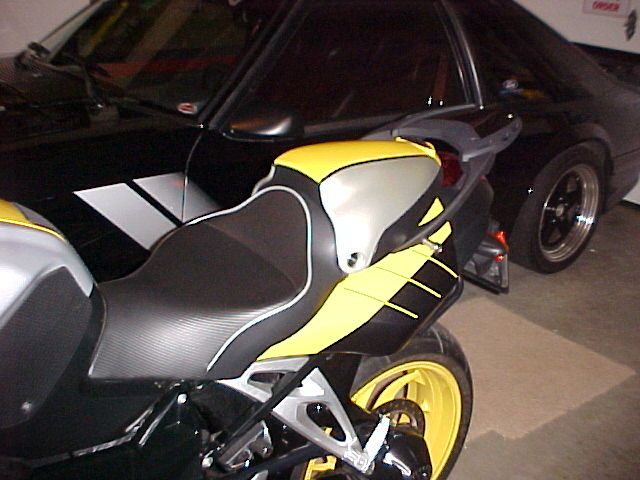
You can also see, from the K13 can's relation to the wheel, that it is further angled upward, and toward the rear of the bike. It just looks better, as it was designed by BMW, in my opinion. 
I think it looks great! Really helps to update the looks of the K12. Any exhaust canister, aftermarket or K13, is a huge upgrade over the stock Howitzer! With the K13 header in place, the sound is unchanged, to my ear. The flapper valve is held open, so you are getting the full K13 can, wide open, at all times. I am not sure if the added 70mm length will alter the HP characteristics of the K1200. For street driving, i believe that you would never notice. In a race application, I know that adding and subtracting length to the exhaust header can make noticeable differences. I am not going to spend any time worrying about trace amounts of HP and torque gained or lost, lol!!

Tuesday, September 18, 2012

Coolant related Dress-up and Upgrades

I have wanted to tackle a couple of dress-up and performance upgrades to my cooling system, for a while now. I have long wanted to dress up my ugly upper radiator hose, already cut up and modified for my Vortech supercharger installation, a few years ago. Most of you know what this modified arrangement looks like, but here is a pic of what I was starting with:

First, I tackled the dress up of the upper radiator hose. My idea was to use the center section of the hose, that was cut out and removed, during the Vortech installation, to cover the stainless steel pipe, and make it look like one, solid silicone hose, if that makes sense. Of course, I had thrown out the leftover silicone hose pieces, when I installed my Vortech! (doesn't everybody?!) I didn't want to spring for an entire new set of the FRRP blue silicone SSP hoses, which was the only option that would match, what I already have. Luckily, I found that Laurel Mountain Mustangs sells just the upper radiator hose for $19.99 plus shipping! What a great deal!
http://www.laurelmountainmustang.com/products/1986-1993-mustang-5-dot-0l-upper-radiator-hose-s-s-p-slash-police
So I bought the new hose, and began to cut it up. Just as an FYI there was maybe 2 oz. of coolant in my upper radiator hose, when I removed it, thats all. I used a cut down plastic water bottle and a hd paper shop towel, to catch the fluid.
Job one was to cut the brand new hose, per the Vortech instructions. They specify that you cut a 3" elbow out of the intake manifold end, and a 2" elbow out of the radiator end of the hose. I cut mine a little long, so that I could 'whittle' my way back, to what I need, and ensure that I didn't end up short. Then I cut down the leftover center section of the hose, to fit in between the two elbows, and 'bridge the gap', covering the stainless pipe.  After futiley attempting to slide the center section of hose, over the ss tube, I now know why nobody else has attempted this! lol I try silicone lubricant and even WD40, to slide the tube, with no luck. All I get is the center piece of silicone, literally stuck, halfway on, refusing to come off. After getting the hose stuck, twice, then removed, I realize that I need to try a different approach. So I lubed up the inside of the hose and the ss pipe, with WD40, and then I heated the hose, super hot, with a heat gun. That did the trick. However, it still was [u]not[/u] easy, not even close. With the hose, burning hot, I was able to get a good portion of it on, then with a lot more heat, inch the hose on, just a little bit at a time. I got three really nasty blisters, before I was smart enough to put gloves on! I also planned on eliminating the metal hose clamps, on the center joints, instead using these trick Gates Powergrip heatshrink clamps. These are the same hose clamps used by Foose, the Ring Brothers, Rad Rides by Troy etc. etc.
I am only going to use the clamps on the center joints, not the manifold or radiator ends. While they are trick and cool, they are one use only, then they have to be cut off, using a special tool. My theory is that if you spend $100K+++ on your car, cutting off $7 clamps, for service is no big deal! I'll retain the metal worm screw clamps, so that the hose can still be easily removed. I then installed the two elbows, and test fit. Then cut and test fit, then repeat, and again, you get the idea. As I said, it was much easier to get to the right fit, just a tiny bit at a time, without ending up being too short!
Once I had the proper fit, I made some witness marks on the new hose and put on the Gates Powerclamps, using a heat gun. Reinstall the hose, and Voila! Here is what we have, now:


I am so proud of how great this hose turned out, words can't express it. Just adds a touch of those mega-dollar custom cars, to my little old car!

I have long wanted to upgrade and replace my cracked, old and nasty OE plastic coolant overflow tank. I never liked the standard rectangular aluminum tanks, or even the round tubular pipe style tanks. Then when I saw the trick new tank from Moroso, in 5.0 magazine, I was sold!

Add caption
 I found the best price on Amazon, and got mine for around $120.

Moroso advertises this as a simple, easy bolt on, using your existing overflow cap. This is not exactly true. If you have a 1986-1993 LX, you are all set. Your cap, which does not include the low coolant sensor, will transfer right over to the new tank. If you have a 1990-1993 GT, your cap and low coolant sensor assembly will easily transfer right over to the aluminum tank. If you have a 1987-1989 GT, your low coolant sensor assembly will not work with this tank. Moroso, does not make this distinction, in any of their advertising. As an aside, Moroso could have very easily made their tank, to accept all caps, and low coolant sensors, if they had done more complete research. From my tone, you can probably figure out that I have the 1989 GT low coolant sensor that will not work with the Moroso tank. Here is what my sensor assembly looks like:
And this is the wiring harness plug for the 87-89 style:
If you wish to install the Moroso tank, and retain your low coolant light feature, you need this cap and low coolant sensor assembly (add $75 for a real OE Ford product, from Latemodel Restoration Supply):
However, it doesn't end there. The 90-93 sensor uses a different, 3 wire harness plug, not the two wire plug that is OE on my car. LateModel Restoration Supply and Blue Oval Industries sell the harness and pigtail, to retrofit, the newer style sensor/cap. Add another $15 added to this 'simple' $100 project!
 
The installation of the tank is very simple and straight forward. Unbolt the old tank, and bolt in the new, it fits perfectly. The aluminum tank is thicker than the plastic one, and has no 'give' of course. This makes screwing on the lower speed nut assembly a chore, but it can be done. I also had to splice into my two-wire harness, and solder in/heat shrink the new three wire plug. 5.0 Resto, nicely provides how to properly hook up the wiring, on their website. The third, extra wire, is simply an added ground. I believe that the two wires would be sufficient, and would find ground, through the circuit, but I wired up the extra wire, anyway. I made everything, super neat, essentially re-making the harness end, with new split loom and friction tape, the same way that Ford did it. Here is how the tank looks, installed, you really can't see too much of it, but you get the idea.
I added the Saleen square metal emblem, not sure if it is going to stay or not.


Here are a couple of pics of the cracks in my old plastic tank:
By the way, one final little 'gift' from Moroso --  they failed to mention that your stock overflow hose is now too short to get from the radiator to the bottom of the aluminum tank. So you will need about 18" of 5/16" (inside diameter) hose, as well. Thanks, Moroso! Great product, but they need to work on their description and include comprehensive instructions, instead of none.
I topped off the coolant, to the max cool level, and topped off the radiator, burped the system, and was good to go!