First, I tackled the dress up of the upper radiator hose. My idea was to use the center section of the hose, that was cut out and removed, during the Vortech installation, to cover the stainless steel pipe, and make it look like one, solid silicone hose, if that makes sense. Of course, I had thrown out the leftover silicone hose pieces, when I installed my Vortech! (doesn't everybody?!) I didn't want to spring for an entire new set of the FRRP blue silicone SSP hoses, which was the only option that would match, what I already have. Luckily, I found that Laurel Mountain Mustangs sells just the upper radiator hose for $19.99 plus shipping! What a great deal!
http://www.laurelmountainmustang.com/products/1986-1993-mustang-5-dot-0l-upper-radiator-hose-s-s-p-slash-police
So I bought the new hose, and began to cut it up. Just as an FYI there was maybe 2 oz. of coolant in my upper radiator hose, when I removed it, thats all. I used a cut down plastic water bottle and a hd paper shop towel, to catch the fluid.
Job one was to cut the brand new hose, per the Vortech instructions. They specify that you cut a 3" elbow out of the intake manifold end, and a 2" elbow out of the radiator end of the hose. I cut mine a little long, so that I could 'whittle' my way back, to what I need, and ensure that I didn't end up short. Then I cut down the leftover center section of the hose, to fit in between the two elbows, and 'bridge the gap', covering the stainless pipe. After futiley attempting to slide the center section of hose, over the ss tube, I now know why nobody else has attempted this! lol I try silicone lubricant and even WD40, to slide the tube, with no luck. All I get is the center piece of silicone, literally stuck, halfway on, refusing to come off. After getting the hose stuck, twice, then removed, I realize that I need to try a different approach. So I lubed up the inside of the hose and the ss pipe, with WD40, and then I heated the hose, super hot, with a heat gun. That did the trick. However, it still was [u]not[/u] easy, not even close. With the hose, burning hot, I was able to get a good portion of it on, then with a lot more heat, inch the hose on, just a little bit at a time. I got three really nasty blisters, before I was smart enough to put gloves on! I also planned on eliminating the metal hose clamps, on the center joints, instead using these trick Gates Powergrip heatshrink clamps. These are the same hose clamps used by Foose, the Ring Brothers, Rad Rides by Troy etc. etc.
I am only going to use the clamps on the center joints, not the manifold or radiator ends. While they are trick and cool, they are one use only, then they have to be cut off, using a special tool. My theory is that if you spend $100K+++ on your car, cutting off $7 clamps, for service is no big deal! I'll retain the metal worm screw clamps, so that the hose can still be easily removed. I then installed the two elbows, and test fit. Then cut and test fit, then repeat, and again, you get the idea. As I said, it was much easier to get to the right fit, just a tiny bit at a time, without ending up being too short!
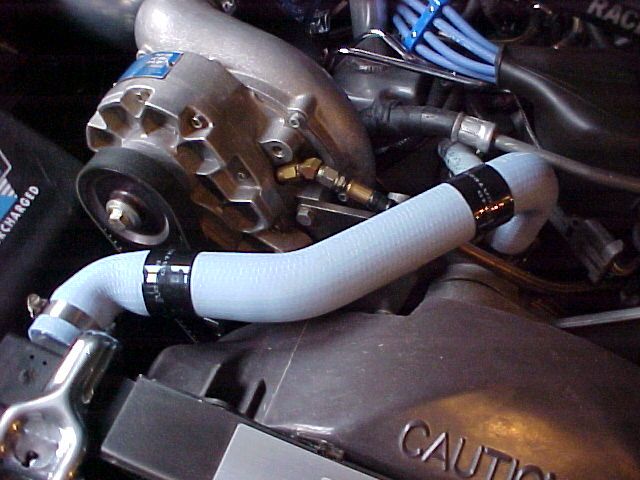
Once I had the proper fit, I made some witness marks on the new hose and put on the Gates Powerclamps, using a heat gun. Reinstall the hose, and Voila! Here is what we have, now:
I am so proud of how great this hose turned out, words can't express it. Just adds a touch of those mega-dollar custom cars, to my little old car!
I have long wanted to upgrade and replace my cracked, old and nasty OE plastic coolant overflow tank. I never liked the standard rectangular aluminum tanks, or even the round tubular pipe style tanks. Then when I saw the trick new tank from Moroso, in 5.0 magazine, I was sold!
 |
| Add caption |
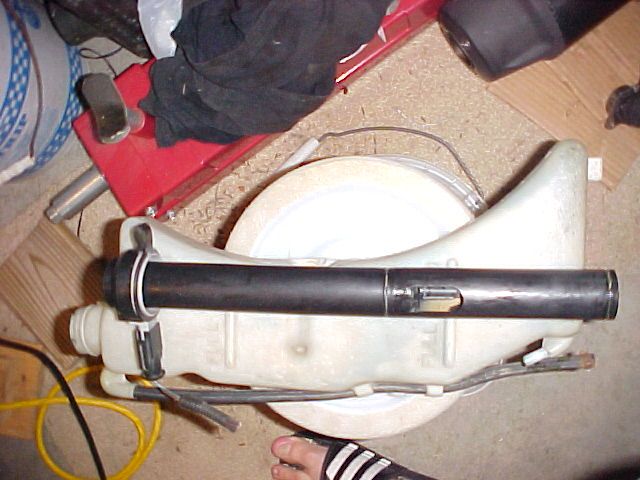
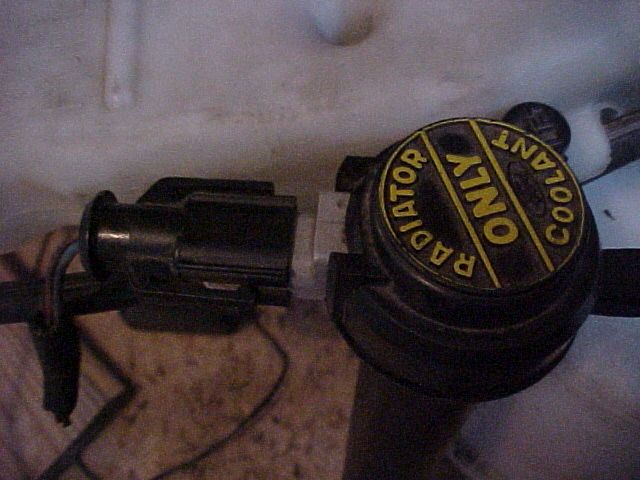
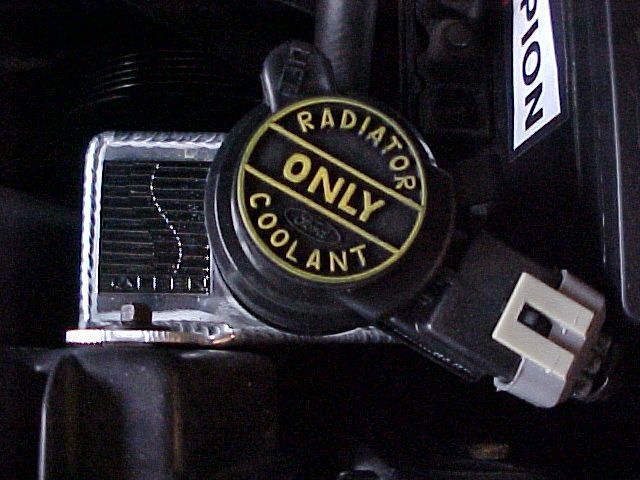
Moroso advertises this as a simple, easy bolt on, using your existing overflow cap. This is not exactly true. If you have a 1986-1993 LX, you are all set. Your cap, which does not include the low coolant sensor, will transfer right over to the new tank. If you have a 1990-1993 GT, your cap and low coolant sensor assembly will easily transfer right over to the aluminum tank. If you have a 1987-1989 GT, your low coolant sensor assembly will not work with this tank. Moroso, does not make this distinction, in any of their advertising. As an aside, Moroso could have very easily made their tank, to accept all caps, and low coolant sensors, if they had done more complete research. From my tone, you can probably figure out that I have the 1989 GT low coolant sensor that will not work with the Moroso tank. Here is what my sensor assembly looks like:
And this is the wiring harness plug for the 87-89 style:
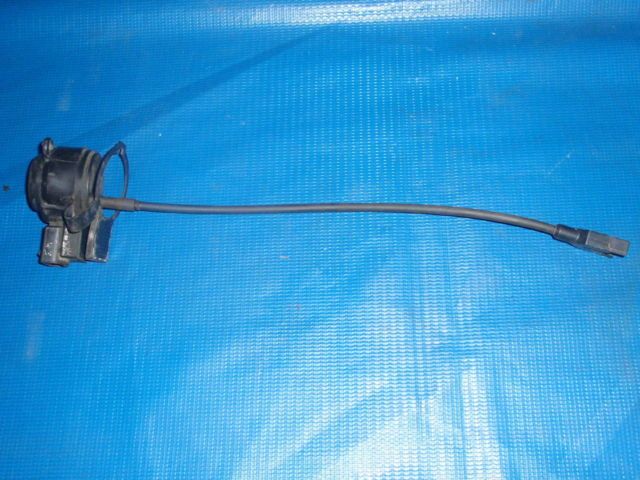
If you wish to install the Moroso tank, and retain your low coolant light feature, you need this cap and low coolant sensor assembly (add $75 for a real OE Ford product, from Latemodel Restoration Supply):
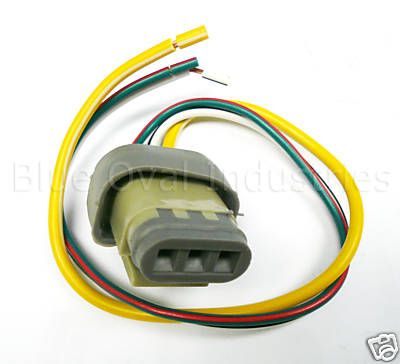
However, it doesn't end there. The 90-93 sensor uses a different, 3 wire harness plug, not the two wire plug that is OE on my car. LateModel Restoration Supply and Blue Oval Industries sell the harness and pigtail, to retrofit, the newer style sensor/cap. Add another $15 added to this 'simple' $100 project!
The installation of the tank is very simple and straight forward. Unbolt the old tank, and bolt in the new, it fits perfectly. The aluminum tank is thicker than the plastic one, and has no 'give' of course. This makes screwing on the lower speed nut assembly a chore, but it can be done. I also had to splice into my two-wire harness, and solder in/heat shrink the new three wire plug. 5.0 Resto, nicely provides how to properly hook up the wiring, on their website. The third, extra wire, is simply an added ground. I believe that the two wires would be sufficient, and would find ground, through the circuit, but I wired up the extra wire, anyway. I made everything, super neat, essentially re-making the harness end, with new split loom and friction tape, the same way that Ford did it. Here is how the tank looks, installed, you really can't see too much of it, but you get the idea.
I added the Saleen square metal emblem, not sure if it is going to stay or not.
By the way, one final little 'gift' from Moroso -- they failed to mention that your stock overflow hose is now too short to get from the radiator to the bottom of the aluminum tank. So you will need about 18" of 5/16" (inside diameter) hose, as well. Thanks, Moroso! Great product, but they need to work on their description and include comprehensive instructions, instead of none.
I topped off the coolant, to the max cool level, and topped off the radiator, burped the system, and was good to go!


