After speaking with Joe Goskinski, and Mark LaMaskin, I came up with this interesting tidbit. Saleen put the gauge cage into a few of their production cars. A very small number, of the original, handmade pieces, were sold through the Speedlab. After Saleen could not or would no longer manufacture the handmade piece, they actually began to sell the Autometer part, through the Speedlab!! Those in the know, will not be surprised, by this questionable move, by Saleen. What the hell, the Autometer part was readily available, and cheap, at 1/3 the price of the handmade piece. So Saleen could still sell the Autometer plate, and two inexpensive Made in Mexico VDO gauges, for $299!! (FP isolators $100 extra!!)
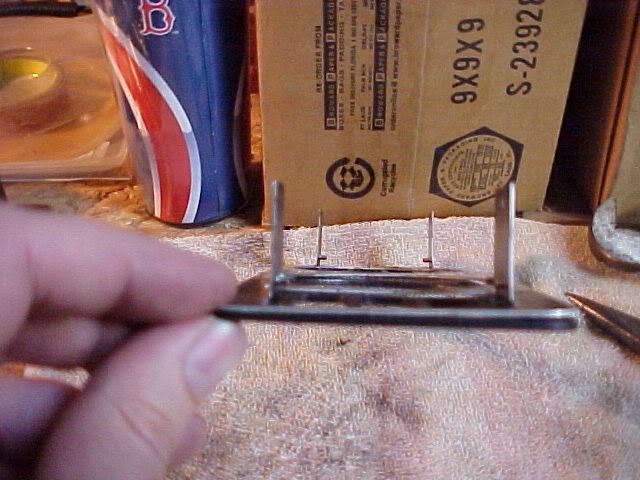
Here is what I started with. Note that the Autometer plate is completely flat, and does not fit well, at all. The dash pad is curved!! Also the corners are bent up, when the screws are tightened etc.
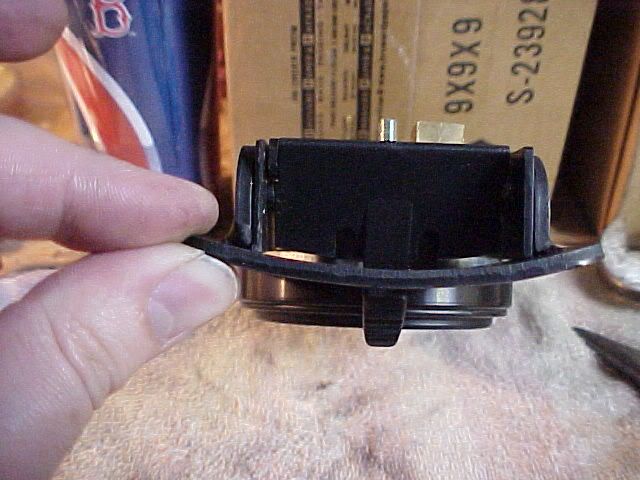
Here is why. Check out the profile of the Autometer panel. It is very thin, and flat. Also note the thin piece of sheet metal, used to hold in the modified AC vents.
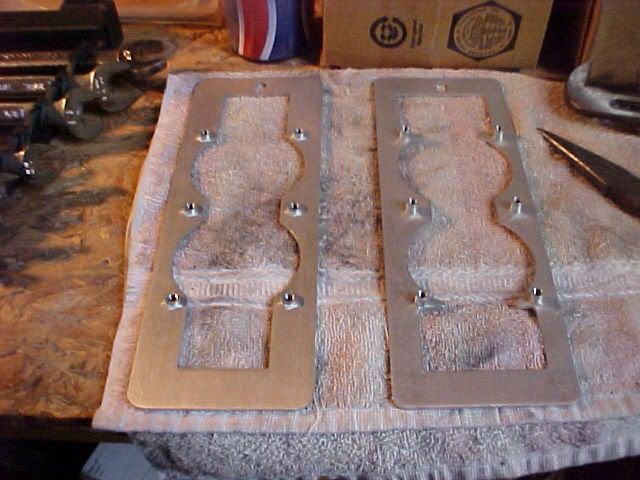
Now check out the backing plates. The Autometer (left) and the Chicane (right) Notice how their is a large area for the AC to flow through the Chicane piece. Also notice that the threaded inserts are pressed/riveted in, from the front, on the Chicane piece, (more on that later). Also, the Autometer plate is much thinner, of course.
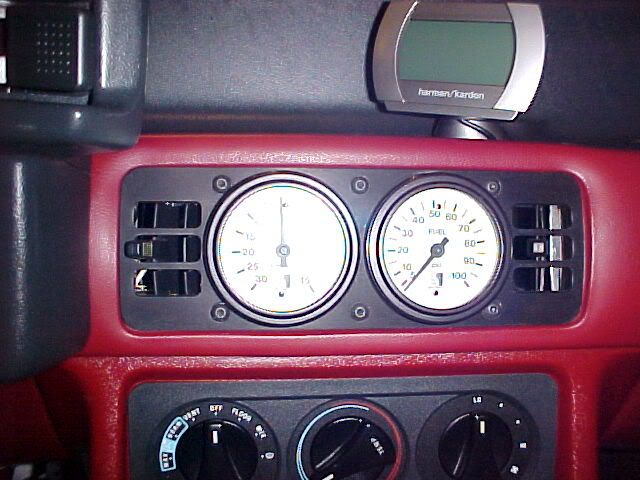
So I go to drop my gauges in, and they don't fit!! WTF! So I try my old Ford Racing gauges, and they don't fit, either! I guess the powdercoating and the handmade tolerances, have left the openings a tiny bit too small, for the gauges. So out come the files and sandpaper, to open up the holes. I could have used a dremel, or a small sanding drum, but I wanted to remove as little material as possible, for a nice, tight fit. Also, the Chicane piece includes two curved trim rings, so that the flat gauges will mate up to the curved panel. They are billet aluminum, and anodized black, very, very trick, indeed! However, this means, that you have one shot, to get the gauges in straight, and line up the trim rings, with the plate. Otherwise, you are pulling it apart, and scratching everything up -- unacceptable. I did pretty good, with one shot, I scored about a 98%, but i am overly critical of myself, nobody else would ever notice the difference! Here is where we are now:

And from the back:

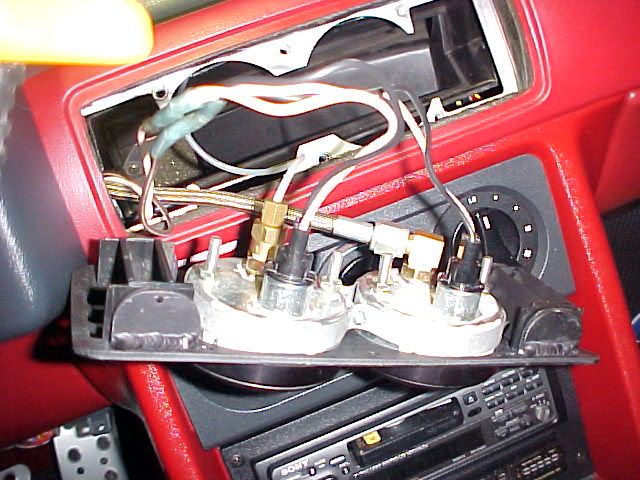
So I get everything hooked up, electrical connections, vacuum line, isolator hose etc, and the Chicane backing panel slid into place, ready for final assembly. I finally get all 6 allen screws started, and if you have ever done this, 6 blind little screws is a major PITA. Then you just tighten up the plates, sandwiching the dash pad. Chicane includes very nice button cap allen screws, versus the autometer which has large diameter regular allen screw heads (ugly) So I set about tightening up the panel, kind of like torque-ing head bolts, a little at a time. I go to finally tighten the last screw, and I hear a metallic 'POP' from behind the assembly. One of the screws is now free, and no longer threaded into the backing plate. Yep, one of the pressed in/riveted thread inserts has popped right out of the Chicane piece!! I string together enough curse words to make George Gast (sailor) run for cover, and resign myself, that I will be starting over. All screws have to come out, and all connections undone to get the backing panel removed. One of the threaded inserts was placed too close to the edge, and there was not enough material to support it, and the plate cracked. If I had any foresight, I would have simply turned the backing panel around, so that the inserts would be less likely to pull out. Oh well, I simply installed it the way it was shipped to me, pre-assembled. If you buy the Chicane panel - You have been warned!! ](*,)
Luckily, I have two Autometer backing plates, to serve as backup. One of them is a very early piece, that actually came from the Speedlab. It is thick, and the threads are welded in, from behind the backing panel. However the vented area is much smaller, restricting the AC flow. So I get out the hacksaws and a large file, and go to town, enlarging the vents. Add another 1/2 hour to the project, lol! I also previously matched up the Autometer plate, to the Chicane, and the scew holes line up, and they are the same diameter, thank God!! Here is a pic, just before the 'carnage.'
Luckily, I have two Autometer backing plates, to serve as backup. One of them is a very early piece, that actually came from the Speedlab. It is thick, and the threads are welded in, from behind the backing panel. However the vented area is much smaller, restricting the AC flow. So I get out the hacksaws and a large file, and go to town, enlarging the vents. Add another 1/2 hour to the project, lol! I also previously matched up the Autometer plate, to the Chicane, and the scew holes line up, and they are the same diameter, thank God!! Here is a pic, just before the 'carnage.'
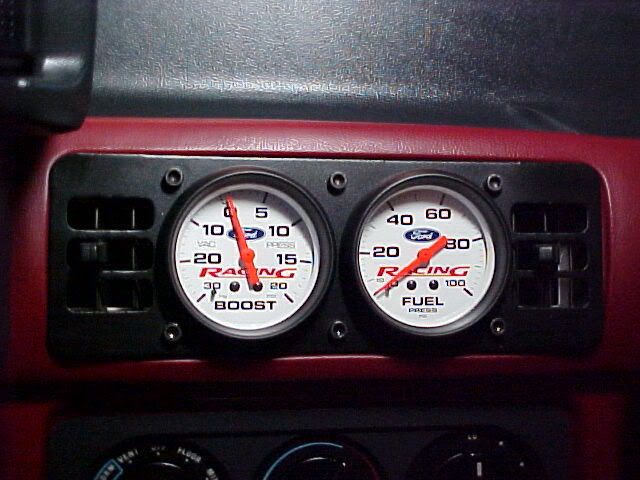
And at night:
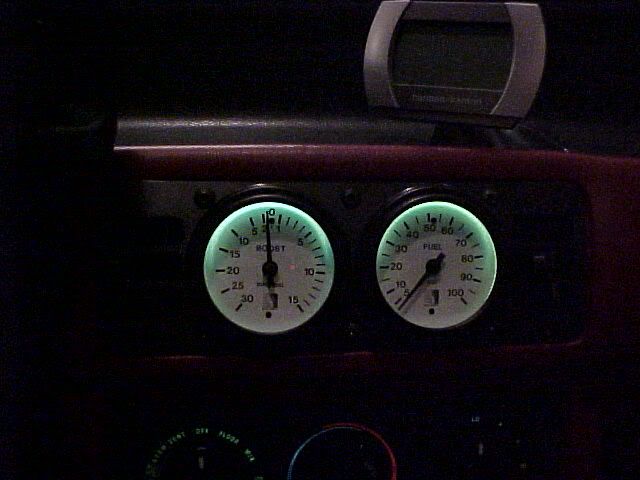
I used those slick little Autometer 'hats' that go over the light bulbs, to change their color. Green in my case to match the factory dash.
This should in no way, be viewed as a criticism, other than constructive, of the Chicane product. It is a 100% handmade custom piece. These minor problems are to be expected when dealing with something that is custom made. If you want easy, then stay away from the custom stuff! This is what makes our hobby fun, the sanding, and grinding, and modifying things to fit!! The end result is well worth it!
No comments:
Post a Comment