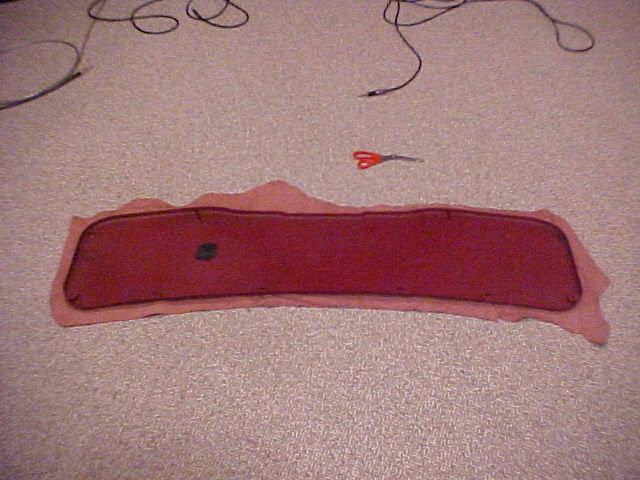

I also thought that it would be cool, to add the SALEEN logo, to this panel, kind of like Saleen did, with the 1999-2004 cars, with their logo'd trunk panel. I purchased a black street sign, with silver Saleen logo, planning on 'frenching' it in, to this panel. However, the street sign proved to be too small, and honestly, it would look just plain cheesy, really cheap looking. So I decided to try my hand at the upholstery technique of embossing the logo, in foam, then covering the panel. Similar to what you see on hot rods, with flames embedded into the door panels etc. So I used the street sign, for a template, and simply scaled up the SALEEN letters, to better fit the panel. Here is the panel, with the paper templates. And no, I didn't forget how to spell Saleen, I only made one 'E' template, which I will duplicate!!
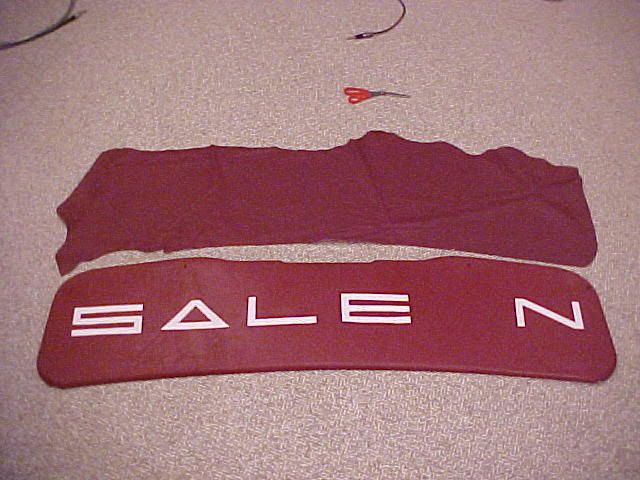
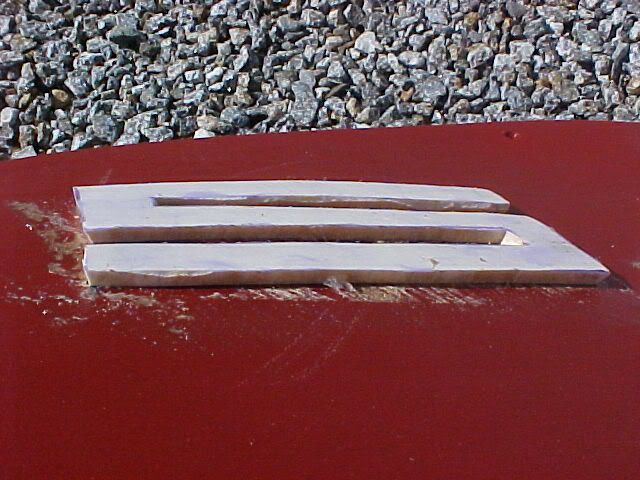
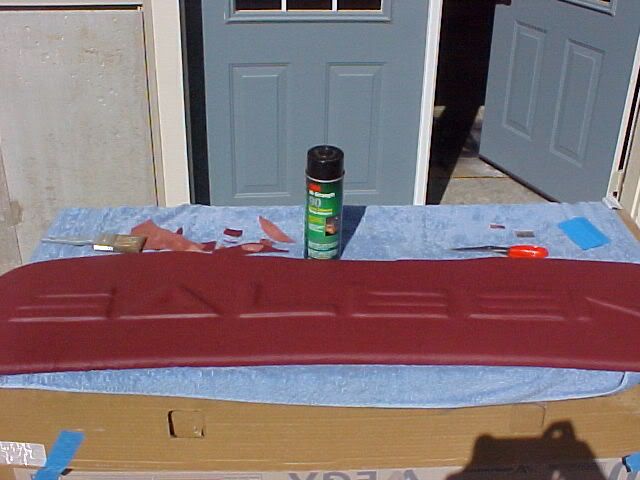
Next I transferred the paper templates on to cardboard, and then finally on to foam. I had a hard time, finding the foam, as I was impatient, and didn't want to order off of the internet and wait for shipping. I found this 3/16" foam, made for laying on metal shelving. You know the kind of closet shelving, made of wire? This lays on it, providing a nice flat surface, so your clothes don't get wire dents in them, or so your cans of food will lay flat, in your pantry, etc. I watched a couple of tutorials, on Youtube, and they all recommended using a razor blade, to cut the foam. I found that this really did work better, than scissors, as you can cut the foam, on a 45 degree bias, providing a much cleaner, more distinct edge. I also used high quality 3M spray adhesive, to attach the foam letters, to the Mustang panel. It worked, really well, but did not leave a lot of time, to move the letters around. I was confident, in my placement, and had the letters/template well layed out, with plenty of witness marks! Here is the panel with the foam letters, glued on, and a close up of the 'S' profile.
Thats it, for now, I will be gluing on the leather, in the next day or so, so stay tuned for an update! BTW, if anyone has any experience with steaming creases/folds out of leather, please chime in. I was planning on using my Steam Shark, to get the leather to lay perfectly flat?
Anyway, here is an updated pic:
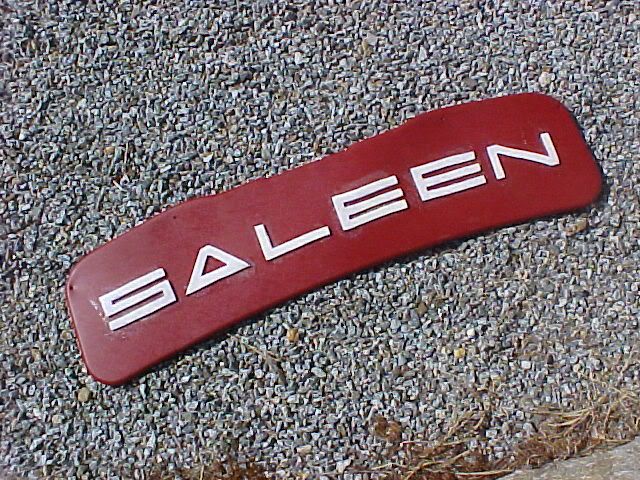
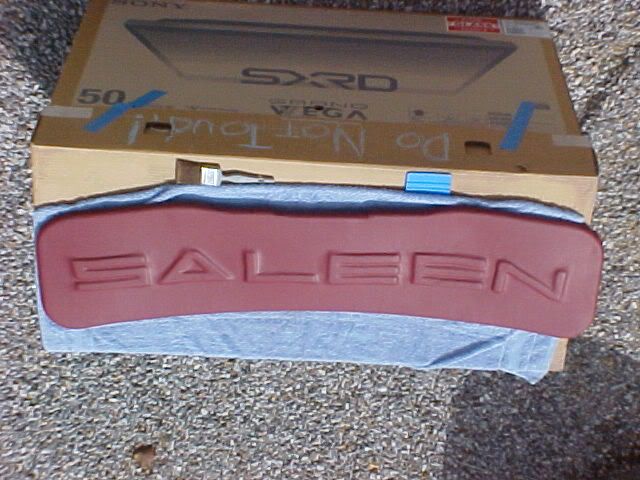
I adhered the leather to the panel, today. I set up a little work bench, out in the sun, and let the leather get nice and warm, first. I started from the center, gluing just the letters, and working my way out to the sides. Like all of my projects, it is not perfect! However, I am OK with that, I have learned to accept, just a shade away from perfection, over the years, lol! A couple of the letters, the edges aren't as sharp or as crisp as I would have liked, but I did end up with no bubbles or wrinkles! I am planning on letting the panel sit, for another day or two, just a few hours each, in the sun. It is my experience, that the leather will contract and shrink, and actually end up looking better. I have used the spray adhesive before, and in the past the media, that was glued, actually shrunk, quite nicely. We'll see. Final pic will be of the panel, mounted up in the hatch of my car.
Not mounted in the car, yet. I will probably get it done, over the weekend. I did take a better pic, of the panel, basking in the sun, earlier today! I had to remove a screen, and lean out a window, to get this pic! The panel is rather large, and it is nearly impossible to get the whole thing into frame, for taking a digital pic. Anyway, I let it sit in the sun, for a while, then went over the whole thing with a decal squeegee. It actually got rid of a couple of bubbles, that had developed overnight, and helped to sharpen up the letters' edges. I felt that too much sun, would be a bad thing, and cause the glue to get soft, and release. So I left it out, for just a little while, then back into the basement, to cool.
BTW, if anyone else wanted one, I would be happy to make one for you! I would just need you to send me your panel, and whatever cloth or leather etc. that you wanted it covered with. I think that shipping back and forth, would be cost prohibitive, however. If anyone was interested in just a set of the foam letters, for a DIY project, just let me know, I would be happy to send any club member a set, you pay for shipping, only!
As promised, here are the pics of the finished product! Once again, I am absolutely thrilled, with how this project turned out.
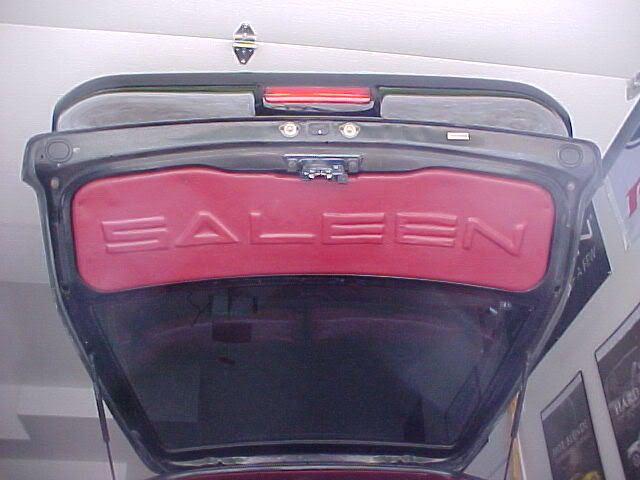
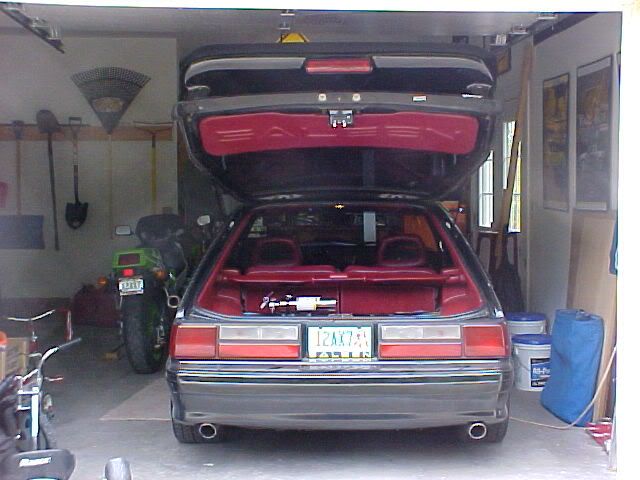
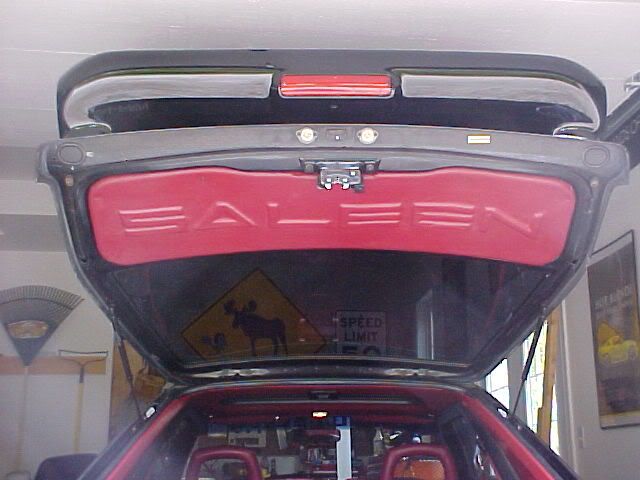
Anxious to hear your feedback!
No comments:
Post a Comment