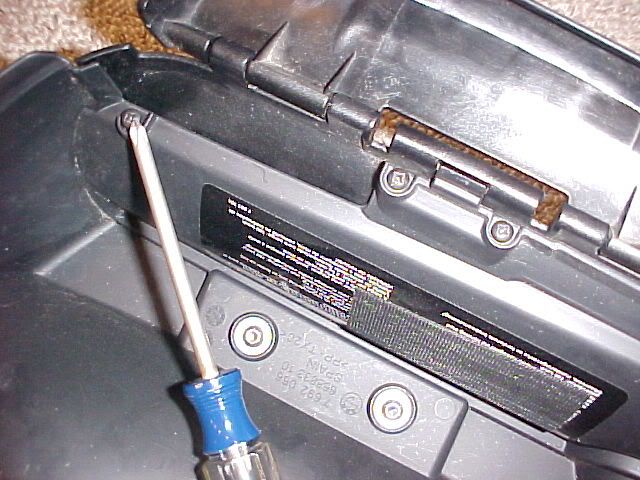
1. Inside of the case there are two small torx bolts that appear to be holding the lid string stays in place. Remove both of these, they have nothing to do with the strings, and they actually hold the black plastic case protectors in place. Take care with the small parts, as there is also a metal insert, in the lid that the bolt goes through, that will be loose.
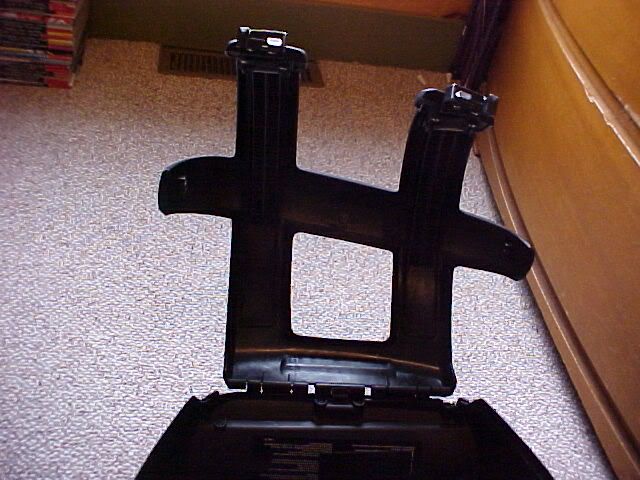
2. Once the bolts are removed, the black plastic case protector can be swung out of the way, exposing the inner hinge. There are four phillips screws in the inner hinge crevice, remove them. On the left pannier all 4 are located in the hinge cavity. On the right hand pannier, three are in the hinge area, one smaller screw is inside the case. Unsnap the string stays from the inner case, now the entire lid and the black plastic protectors can be removed as an assembly.
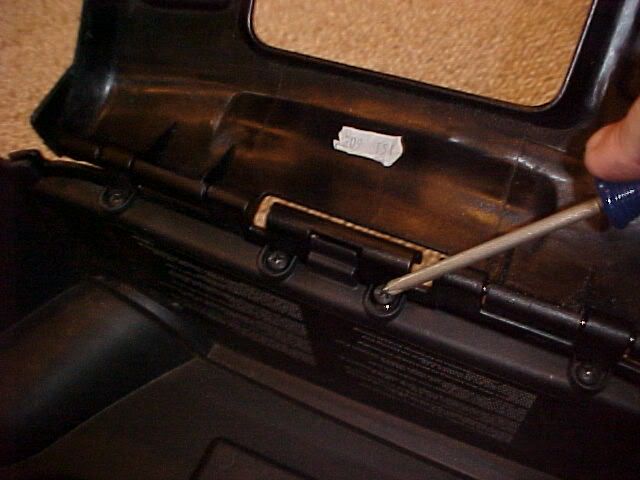
3. The black case protectors can be separated from the lid by separating the two hinges. The grey lids hinge is just a portion of the metal rod that the lid uses for strength. It takes a little bit of manipulation to separate the rod from the black case protector hinge, but once they are apart, you are done.
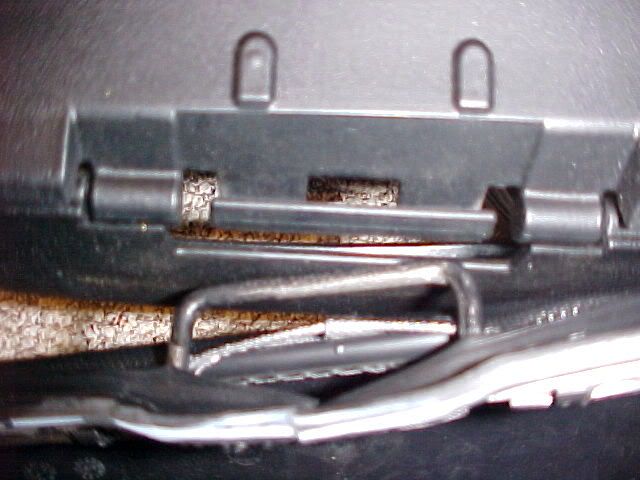
Here is a pic of the case protectors, swung out of the way, once the top/lid portion of the panniers has been removed:
Now you have just the grey lid portion, ready for painting. The expandable vinyl portion does not appear to come off, and looks to be sewn on. This will have to be masked off, unless you plan on painting it as well (with vinyl dye or similar).
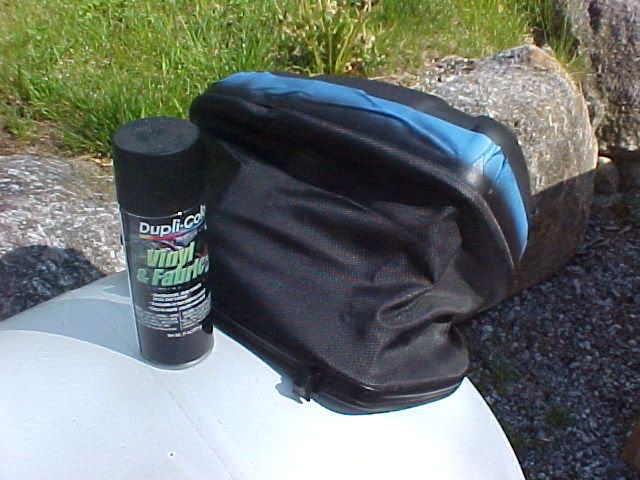
I am going to use a black satin plastic fusion paint on mine. I am undecided as to whether or not I am going to dye the vinyl expansion portion black or not, so I am looking for opinions? Thanks.
I painted mine up today. The weather was beautiful, around 70 degrees with no humidity. I took my sport panniers apart, and masked them off. Then I cleaned and degreased them. I gave them a light scuff with a red Scotch Brite pad, even though the surface is quite textured, already. Then I cleaned them again and again and again. I used Duplicolor adhesion promotor then Duplicolor flat black acrylic enamel. Multiple light coats of each. The paint job came out, fantastically, if I do say so myself! I haven't decided if I am going to use black vinyl dye on the grey expandable portion of the panniers. I do not intend to run the panniers, in their expanded position, ever, so I may just leave it, as a slight contrast. We'll see once I get them put back together. This project was very easy, and I would recommend it to anyone, with even the most basic DIY skills!
I snapped a couple of pics:
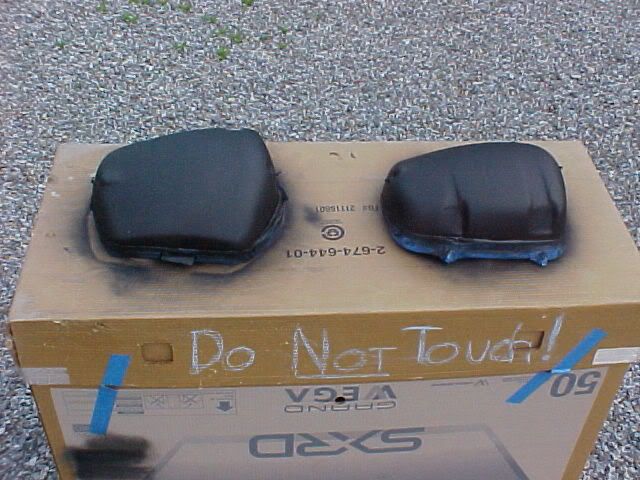
ps. The 'Do Not Touch' is for my kids, from a previous project, left drying in their line of fire, lol!
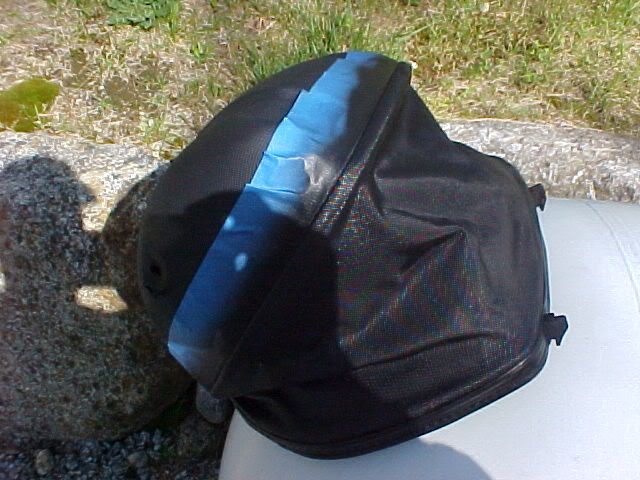
I am still torn on whether or not to use the black vinyl dye on the expandable grey vinyl portion. I definitely do not like the contrasted look, from the flat black case, to the grey/silver liner. However, they will not show, when the cases are closed up. Lastly, now is the time, if I want to dye the vinyl black, while the cases are all torn down. I also have to wait for good weather! Although yesterday was beautiful, rain is forecast for the rest of the week. :( I'm certain that the vinyl will accept the dye, very well, and most likely that is the route that I am going to go with. Here are a couple of pics of the case tops, with the masking removed:

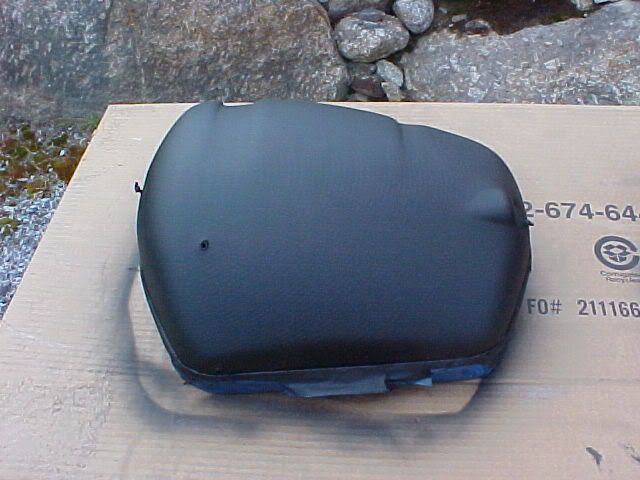
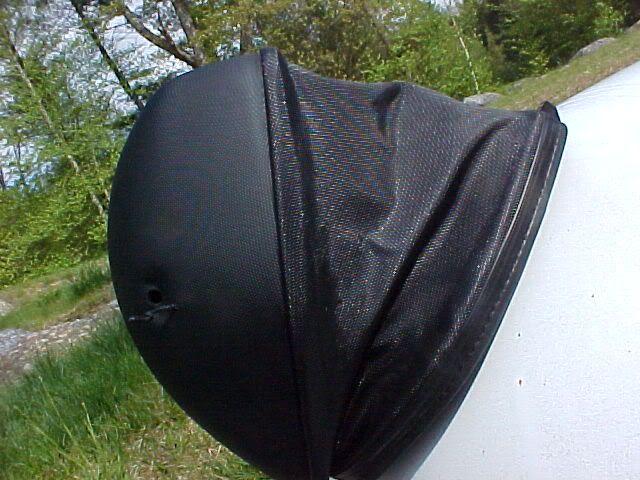
I got the expandable grey vinyl painted up today. The weather wasn't quite as nice as I would have liked, as it was only 60 degrees. However, I put the cases in the direct sun for a while, and the new black paint heated up quite nicely. The Duplicolor vinyl and fabric dye is very easy to use, and also very forgiving. The dye is super thin, as it is designed to sink into and penetrate the vinyl, as it is a dye, not a paint. It will run, so multiple thin coats is the way to go. You have to make sure that you are starting with a very clean surface to dye, as well. I know the pictures are grainy, but the final product looks great! Here are a few pics:
The next installment will be a 'prequel' with pics of the assembly, in reverse, added to the post, describing how to take apart the panniers. This thread, when completed could be moved to the 'How To' section, as there is precious little out there about our high tech expensive panniers.
Here are a couple of 'top tips' for re-assembly; the cases [u]must[/u] be re-assembled in this order! Refer to the disassembly pics, for reference!
1. Screw the exterior case protector to the bottom of the back half of the case. Only re-install the two outer screws at this time! The two inside screws need to be left off, so that the case lid will still easily snap back into place. The two inner screws hold tension against the plastic tab that holds the hinge in place. (I removed the two inner screws, once I figured this out, lol!)
2. Now manipulate the metal rod/hinge on the cover into place, snapping it into the plastic side of the hinge, on the backside of the case.
3. Re-install the two center phillips head screws on the hinge panel. A right angle phillips head or phillips head socket makes this step easier, just take care not to strip out the screw heads, as they are now obstructed by the case top/lid.
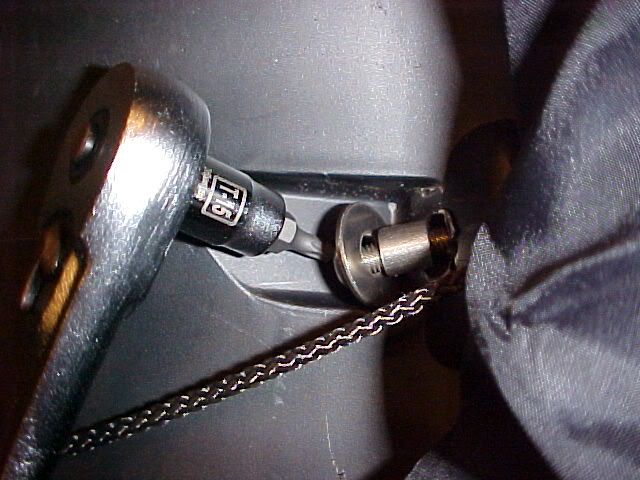
4. Re-install the two t-15 torx bolts/spacer/washer assembly on the inside of the case, which hold the exterior case protector in place. Some pressure may need to be applied to the case protectors, to get the holes to line up.
5. Snap the string stays back into place and you are done!
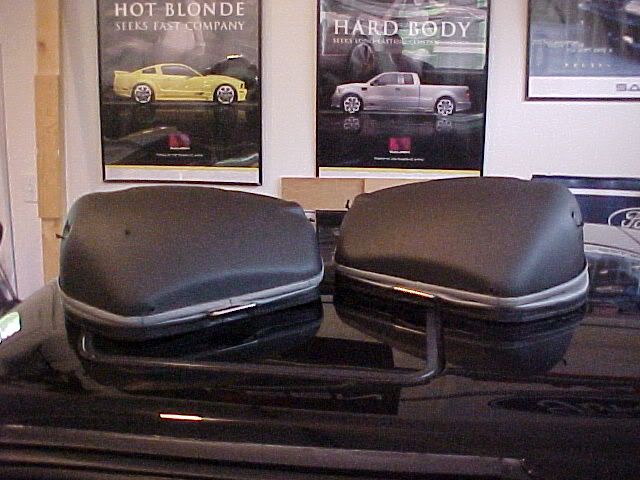
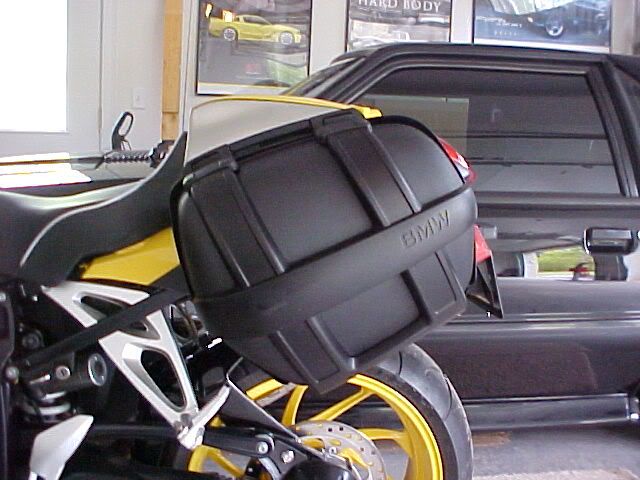
And the final product:

Definitely interested in feedback, and success stories, if anyone else out there does this!
How has the paint lasted with your bags? Thanks for blogging all the details on the work that you did.
ReplyDeleteThe paint is still perfect. Bear in mind, I only use my sport panniers, occasionally, and I am a weekend, fair weather rider, only. I am confident that my paint job, with the proper preparation will last many years, and through the elements (rain, wind etc. no snow!). The bags look so much better than the gray/black stockers, it was well worth the effort.
ReplyDeleteThanks much. They do look great.
DeleteI am so excited about this! Thank you for sharing! I've been waiting to purchase the panniers until I could confirm they were paintable. I'm going to take them to the bodyshop and have them color matched to my electric blue 2005 K1200S. Perfect! Thank you!
ReplyDelete